In this post, we're going to create a very simple ASP.NET Core 2.1 application which uses Dapper to access data. There's already a sample project worked up over on GitHub, and you might want to use that to follow along here.
Step 1: Get the NuGet Package
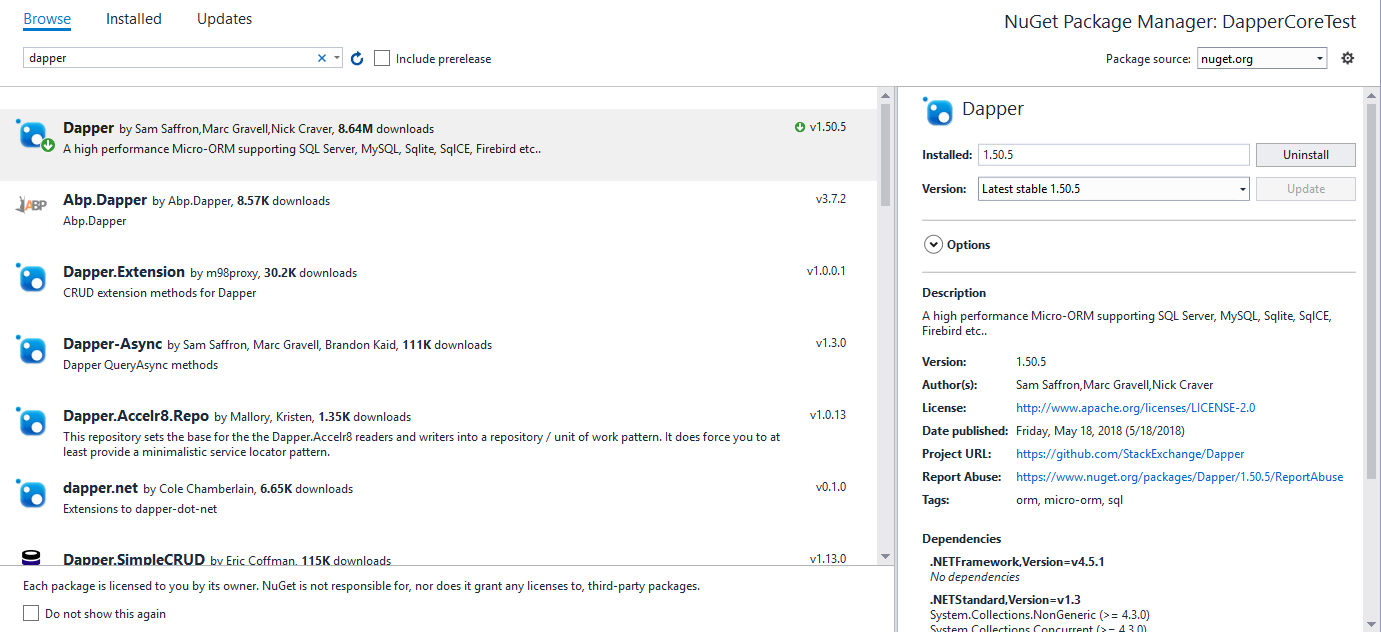
First things first, we need to grab the NuGet package for Dapper. In Visual Studio, you can do this by right-clicking on your project file and selecting Manage NuGet Packages and then search for the Dapper package, like so:
With that installed, let's try creating a repository.
Step 2: Creating an Employee Class and Repository
For this demo, I am not going to go over how to create a database or show a demo database with sample data; I don't have one available and it's a pain to make one. So let's assume we have a table Employee with columns for FirstName, LastName, ID, and DateOfBirth. We can make a corresponding C# class for this table, like so:
public class Employee
{
public int ID { get; set; }
public string FirstName { get; set; }
public string LastName { get; set; }
public DateTime DateOfBirth { get; set; }
}
Now we need a sample repository. Let's call it EmployeeRepository and give it an interface so we can use ASP.NET Core's Dependency Injection setup.
Here's the interface:
public interface IEmployeeRepository
{
Task<Employee> GetByID(int id);
Task<List<Employee>> GetByDateOfBirth(DateTime dateOfBirth);
}
Now we can work up a skeleton implementation of this repository. Here's what we're starting with:
public class EmployeeRepository : IEmployeeRepository
{
public async Task<Employee> GetByID(int id)
{
}
public async Task<List<Employee>> GetByDateOfBirth(DateTime dateOfBirth)
{
We also need to update our project's Startup file to include our new repository in the services layer:
public class Startup
{
public Startup(IConfiguration configuration)
{
Configuration = configuration;
}
public IConfiguration Configuration { get; }
public void ConfigureServices(IServiceCollection services)
{
services.AddTransient<IEmployeeRepository, EmployeeRepository>();
services.AddMvc().SetCompatibilityVersion(CompatibilityVersion.Version_2_1);
}
public void Configure(IApplicationBuilder app, IHostingEnvironment env)
{
//...
}
}
Next, we need to enable this repository to use Dapper. Before we can do that, however, we need it to be aware of what connection string we are using.
Step 3: Injecting IConfiguration
Very often in ASP.NET Core projects, Connection Strings are defined in the appSettings.json file:
{
"Logging": {
"LogLevel": {
"Default": "Debug",
"System": "Information",
"Microsoft": "Information"
}
},
"ConnectionStrings": {
"MyConnectionString": "MyConnectionString"
}
}
The problem is: how do we pass that connection string to the repository so it can create a SqlConnection object for Dapper to use.
ASP.NET Core introduces a new IConfiguration object which can be injected into other classes. That injected instance will contain a method called GetConnectionString which we can use to obtain our connection string from the appSettings.json files. So, let's inject IConfiguration like so:
public class EmployeeRepository : IEmployeeRepository
{
private readonly IConfiguration _config;
public EmployeeRepository(IConfiguration config)
{
_config = config;
}
//Remainder of file is unchanged
}
Step 4: Creating a SqlConnection
With the injected IConfiguration now available to our repository, we can create a Dapper-enabled SqlConnection object that all of our repository's methods can utilize.
public class EmployeeRepository : IEmployeeRepository
{
private readonly IConfiguration _config;
public EmployeeRepository(IConfiguration config)
{
_config = config;
}
public IDbConnection Connection
{
get
{
return new SqlConnection(_config.GetConnectionString("MyConnectionString"));
}
}
//Remainder of file is unchanged
}
Step 5: Employee by ID
Let's first create a method to return employees by their ID.
To start, let's remember that the way Dapper works is by processing raw SQL and then mapping it to an object. Because our table columns and object properties share the same names, we don't need to do any special mapping here.
Here's the implementation of our GetByID method:
public class EmployeeRepository : IEmployeeRepository
{
//...
public async Task<Employee> GetByID(int id)
{
using (IDbConnection conn = Connection)
{
string sQuery = "SELECT ID, FirstName, LastName, DateOfBirth FROM Employee WHERE ID = @ID";
conn.Open();
var result = await conn.QueryAsync<Employee>(sQuery, new { ID = id });
return result.FirstOrDefault();
}
}
}
Step 6: Employees by Date of Birth
We also need to get all employees born on a particular date. Since we are now returning a collection of employees rather than a single one, the implementation changes very slightly.
public class EmployeeRepository : IEmployeeRepository
{
//...
public async Task<List<Employee>> GetByDateOfBirth(DateTime dateOfBirth)
{
using (IDbConnection conn = Connection)
{
string sQuery = "SELECT ID, FirstName, LastName, DateOfBirth FROM Employee WHERE DateOfBirth = @DateOfBirth";
conn.Open();
var result = await conn.QueryAsync<Employee>(sQuery, new { DateOfBirth = dateOfBirth });
return result.ToList();
}
}
}
Step 7: Implement the Controller
The final step is creating a controller to which our EmployeeRepository can be injected. Here it is:
[Route("api/[controller]")]
[ApiController]
public class EmployeeController : ControllerBase
{
private readonly IEmployeeRepository _employeeRepo;
public EmployeeController(IEmployeeRepository employeeRepo)
{
_employeeRepo = employeeRepo;
}
[HttpGet]
[Route("{id}")]
public async Task<ActionResult<Employee>> GetByID(int id)
{
return await _employeeRepo.GetByID(id);
}
[HttpGet]
[Route("dob/{dateOfBirth}")]
public async Task<ActionResult<List<Employee>>> GetByID(DateTime dateOfBirth)
{
return await _employeeRepo.GetByDateOfBirth(dateOfBirth);
}
}
Summary
That's it! We've implemented Dapper into our ASP.NET Core 2.1 application!