
August 20, 2018 11:29 by
 Peter
PeterThis post is about Automapper. As its name suggests, it will do some sort of mapping. Now, the question is, what sort of mapping? Well, this mapping is all about mapping the properties of two objects with each other. If you have worked on MVC, you must have come across the scenario, where the situation demands you to map properties of the model with the properties of ViewModel. Isn't it a common scenario? So, one way to achieve this is to map each and every property manually with a lot of code, which in turn become very tedious when there are many properties of an object. Another major disadvantage of this approach is it's error-prone.
Hence, Automapper came to rescue. Automapper is an object to object mapping which reduces the manual effort of mapping each property of a class with the same properties of another class. So, let’s start by writing some code and see how it works.
Step 1
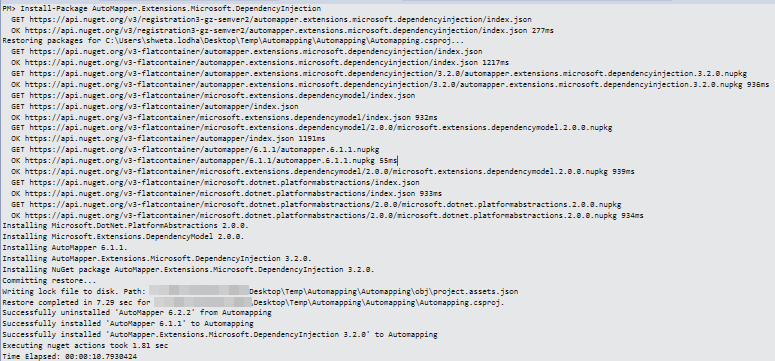
First step is to add the required dependency. This can be done either by using UI or by using Nuget package console,
Install-Package AutoMapper.Extensions.Microsoft.DependencyInjection
if you are using console to add dependency, then on successful installation of the package, the below message will be shown,
Step 2
Get ready with classes which are to be mapped. Here in this case, we have one model class and one ViewModel class as shown below,
public class Contact
{
public string Name { get; set; }
public string SecurityNumber { get; set; }
public string Address { get; set; }
}
ContactViewModel
public class ContactViewModel
{
public string Name { get; set; }
public string SecurityNumber { get; set; }
public string City { get; set; }
public string State { get; set; }
}
Step 3
Create a class which will take care of all the mappings as shown below, by inheriting the profile which is defined in Automapper namespace,
public class MappingEntity:Profile
{
public MappingEntity()
{
CreateMap<ContactViewModel, Contact>();
}
}
Step 4
Register this MappingEntity class in Startup class under ConfigureServices method as shown below,
public void ConfigureServices(IServiceCollection services)
{
services.AddMvc();
services.AddAutoMapper(x => x.AddProfile(new MappingEntity()));
}
Step 5
Final step is to do the changes in Controller class to accomodate this mapping.
public class HomeController : Controller
{
private readonly IMapper _mapper;
public HomeController(IMapper mapper)
{
_mapper = mapper;
}
public IActionResult Index(ContactViewModel vm)
{
var contact = _mapper.Map<Contact>(vm);
return View();
}
...
}
Now, as per the business requirement, the contact object declared in line number 11 can be used. That's all about automapping.
HostForLIFE.eu ASP.NET Core 2.2.1 Hosting
European best, cheap and reliable ASP.NET hosting with instant activation. HostForLIFE.eu is #1 Recommended Windows and ASP.NET hosting in European Continent. With 99.99% Uptime Guaranteed of Relibility, Stability and Performace. HostForLIFE.eu security team is constantly monitoring the entire network for unusual behaviour. We deliver hosting solution including Shared hosting, Cloud hosting, Reseller hosting, Dedicated Servers, and IT as Service for companies of all size.

August 15, 2018 11:14 by
PeterIn this article, we will discuss an easy way to call our REST APIs in .NET Core. When we call other APIs in .NET Core, HttpClient will be the first choice. And most of us will create a wrapper to make it easy to use. There are many libraries that are based on HttpClient which help us to call REST APIs.
In this article, I will use WebApiClient.
WebApiClient
WebApiClient is an awesome project which help us to call HTTP(S) APIs. For more information, please visit its GITHUB page,
Here I will use WebApiClient.JIT to demonstrate how to use. Let's begin!
Create Some APIs
Here I use ASP.NET Core WebAPI to creat some RESTful APIs.
[Route("api/[controller]")]
public class PersonsController : Controller
{
// GET: api/persons
[HttpGet]
public IEnumerable<Person> Get()
{
return new List<Person>
{
new Person{Id = 1 , Name = "stewart"},
new Person{Id = 2 , Name = "peter"}
};
}
// GET api/persons/5
[HttpGet("{id}")]
public Person Get(int id)
{
return new Person { Id = id, Name = "name" };
}
// POST api/persons
[HttpPost]
public Person Post([FromBody]Person person)
{
if (person == null) return new Person();
return new Person { Id = person.Id, Name = person.Name };
}
// PUT api/persons/
[HttpPut]
public string Put([FromBody]int id)
{
return $"put {id}";
}
// DELETE api/persons/5
[HttpDelete("{id}")]
public string Delete(int id)
{
return $"del {id}";
}
}
Interface Declaration
Create an interface named IPersonApiClient which inherit from IHttpApiClient.
public interface IPersonApiClient : IHttpApiClient { }
Add some methods that need to call APIs.
Every method must have a HTTP attribute that provides the request method and relative URL. The return type should be ITask<T>.
[HttpGet("/api/persons")]
ITask<List<Person>> GetPersonsAsync();
A request URL can be updated dynamically using replacement blocks and parameters on the method. A replacement block is an alphanumeric string surrounded by { and }.
[HttpGet("/api/persons/{id}")]
ITask<Person> GetPersonAsync(int id);
When our requst parameters should in request body, we can use some attributes to specify the content, such as JsonContent, FormContent .etc.
[HttpPost("/api/persons")]
ITask<Person> AddPersonAsync([JsonContent]Person person);
The following code demonstrates the basic usage.
public interface IPersonApiClient : IHttpApiClient
{
[HttpGet("/api/persons")]
ITask<List<Person>> GetPersonsAsync();
[HttpGet("/api/persons/{id}")]
ITask<Person> GetPersonAsync(int id);
[HttpPost("/api/persons")]
ITask<Person> AddPersonAsync([JsonContent]Person person);
[HttpPut("/api/persons")]
ITask<string> EditPersonAsync([JsonContent]int id);
[HttpDelete("/api/persons/{id}")]
ITask<string> DeletePersonAsync(int id);
}
The next step is how to retrieve the response of the request.
Retrieving Response
We should create a client first. After creating , what we need to do is call the methods we declared in the interface.
//specify the config
var config = new HttpApiConfig
{
HttpHost = new Uri("http://localhost:9999"),
};
var client = HttpApiClient.Create<IPersonApiClient>(config);
var persons = await client.GetPersonsAsync();
Console.WriteLine("GetPersonsAsync result:");
foreach (var item in persons)
{
Console.WriteLine($"{item.Id}-{item.Name}");
}
var person = await client.GetPersonAsync(1000);
Console.WriteLine("GetPersonAsync result:");
Console.WriteLine($"{person.Id}-{person.Name}");
var newPerson = new Person { Id = 999, Name = "999" };
var postResult = await client.AddPersonAsync(newPerson);
Console.WriteLine("AddPersonAsync result:");
Console.WriteLine($"{postResult.Id}-{postResult.Name}");
var editResult = await client.EditPersonAsync(1);
Console.WriteLine("EditPersonAsync result:");
Console.WriteLine($"{editResult}");
var delResult = await client.DeletePersonAsync(1);
Console.WriteLine("DeletePersonAsync result:");
Console.WriteLine($"{delResult}");
HostForLIFE.eu ASP.NET Core 2.2.1 Hosting
European best, cheap and reliable ASP.NET hosting with instant activation. HostForLIFE.eu is #1 Recommended Windows and ASP.NET hosting in European Continent. With 99.99% Uptime Guaranteed of Relibility, Stability and Performace. HostForLIFE.eu security team is constantly monitoring the entire network for unusual behaviour. We deliver hosting solution including Shared hosting, Cloud hosting, Reseller hosting, Dedicated Servers, and IT as Service for companies of all size.
August 13, 2018 12:12 by
PeterHave you ever encountered a scenario when you have to download a few files zipped and compressed? Few developments involving the manipulation of documents and its management would require this. There are a lot of packages out in the market. Here, in this article, I would be sharing the use of DotNetZip package used to zip, unzip & compress files using C#, VB.NET, & any .NET language.
Once downloaded, it's all set to use the DotNetzip package to start zipping the files and compressing them. For the files to be zipped, here I will be using the file path and select each file to be zipped. Here also, we will see how a file is created on the fly (a PDF using Rotativa) is saved in the same folder and zipped.
File created on the fly using Rotativa
var pdfResult = new Rotativa.PartialViewAsPdf("~/Template.cshtml", model) //This is HTML that would be generated as PDF
{
FileName = "Template.pdf"
};
var resultSet = pdfResult.BuildPdf(ControllerContext);
if (resultSet != null) {
string path = Path.Combine(Server.MapPath(subPath));
FileStream fs = new FileStream(path + ".pdf", FileMode.Create, FileAccess.ReadWrite);
BinaryWriter bw = new BinaryWriter(fs);
bw.Write(resultSet);
bw.Close();
}
The above code snippet is generating a PDF using a cshtml Razor View page using Rotativa Using Rotativa Best to follow the mentioned article for more information to generate PDF using Rotativa using MVC. Let's look at the code snippet for zipping.
using(ZipFile zipFile = new ZipFile()) {
//Get all filepath from folder
String[] files = Directory.GetFiles(Server.MapPath("/"));
string fileUniqueName = "Template"
foreach(string file in files) {
if (file.Contains(fileUniqueName.ToString())) {
zipFile.AddFile(file, @ "TemplateDocs_" + DateTime.Now);
//Adding files from filepath into Zip
}
}
Response.ClearContent();
Response.ClearHeaders();
//Set zip file name
Response.AppendHeader("content-disposition", "attachment; filename=TemplatedDocuments.zip");
zipFile.CompressionMethod = CompressionMethod.BZip2;
zipFile.CompressionLevel = Ionic.Zlib.CompressionLevel.BestCompression;
//Save the zip content in output stream
zipFile.Save(outputStream);
}
//Set the cursor to start position
outputStream.Position = 0;
String[] filesToDelete = Directory.GetFiles(Server.MapPath("/"));
foreach(string file in filesToDelete) {
if (file.Contains(fileUniqueName.ToString())) {
FileInfo fi = new FileInfo(file);
fi.Delete();
}
}
return new FileStreamResult(outputStream, fileType);
The above snippet is just required to start zipping and compressing the files. As you can see using block for the ZipFile is created with instantiation of its object.
Then, the files present under the path are navigated using Server.MapPath(""), Once the path is set, the files if with some unique string character in the filename needs to be searched and only zipped, is set to a variable.
Then each file is looped through and added to the ZipFile object, here zipFile.AddFiles(file, ZippedFolderName); ZipFolderName here is the name you set for the folder having all the files after extraction.
There are three compression levels for the ZipFile an enum which describes through code as below,
//
// Summary:
// The method of compression to use for a particular ZipEntry.
//
// Remarks:
// http://www.pkware.com/documents/casestudies/APPNOTE.TXT describes a number of
// distinct cmopression methods that can be used within a zip file. DotNetZip supports
// a subset of them.
public enum CompressionMethod {
//
// Summary:
// No compression at all. For COM environments, the value is 0 (zero).
None = 0,
//
// Summary:
// DEFLATE compression, as described in http://www.ietf.org/rfc/rfc1951.txt. This
// is the "normal" compression used in zip files. For COM environments, the value
// is 8.
Deflate = 8,
//
// Summary:
// BZip2 compression, a compression algorithm developed by Julian Seward. For COM
// environments, the value is 12.
BZip2 = 12
}
The above are the three algorithms used. I personally have used only BZip2 based on few good reviews. Once compressed and all files inserted into the folder, the zipped folder is ready to be downloaded using the FileStreamResult in MVC action. This is the simple explanation and the code snippet for the Zip file concept. This is simple and really handy to be used and it also provides the compression algorithms which are good to go with.
HostForLIFE.eu ASP.NET Core 2.2.1 Hosting
European best, cheap and reliable ASP.NET hosting with instant activation. HostForLIFE.eu is #1 Recommended Windows and ASP.NET hosting in European Continent. With 99.99% Uptime Guaranteed of Relibility, Stability and Performace. HostForLIFE.eu security team is constantly monitoring the entire network for unusual behaviour. We deliver hosting solution including Shared hosting, Cloud hosting, Reseller hosting, Dedicated Servers, and IT as Service for companies of all size.
August 8, 2018 09:12 by
PeterWhile working on the dotNetTips Dev Cleaner utility, I wanted to make the deletion of files even faster. While writing this utility I found and worked on speed issues, almost all relating to updating the user interface. So to decouple the deleting from the UI, I decided to add a new feature to the dotNetTips.Utility open source project.
Processor Class
I added a new class in the dotNetTips.Utility.IO namespace called Processor. The purpose of this class is to copy, move and delete files while firing events that can be used to update the UI. Unlike other methods I have used in other frameworks if an exception occurs, it fires an event and keeps processing.
First I created the event,
public event EventHandler<ProgressEventArgs> Processed;
protected virtual void OnProcessed(ProgressEventArgs e)
{
EventHandler<ProgressEventArgs> processedEvent = this.ProcessedEvent;
if (processedEvent != null)
{
processedEvent(this, e);
}
}
//The event above is called by the code below:
public int DeleteFiles(IEnumerable<FileInfo> files)
{
Encapsulation.TryValidateParam(files, "files", "");
int result = 0;
IEnumerator<FileInfo> enumerator;
try
{
enumerator = files.AsParallel<FileInfo>().GetEnumerator();
while (enumerator.MoveNext())
{
FileInfo current = enumerator.Current;
if (current.Exists)
{
try
{
current.Delete();
result++;
ProgressEventArgs e = new ProgressEventArgs();
e.Name = current.FullName;
e.ProgressState = ProgressState.Deleted;
e.Size = current.Length;
this.OnProcessed(e);
continue;
}
catch (Exception ex)
{
ProjectData.SetProjectError(ex);
ProgressEventArgs e1 = new ProgressEventArgs();
e1.Name = current.FullName;
e1.ProgressState = ProgressState.Error;
e1.Size = current.Length;
e1.Message = ex.Message;
this.OnProcessed(e1);
ProjectData.ClearProjectError();
continue;
}
}
ProgressEventArgs e2 = new ProgressEventArgs();
e2.Name = current.FullName;
e2.ProgressState = ProgressState.Error;
e2.Size = current.Length;
e2.Message = Resources.FileNotFound;
this.OnProcessed(e2);
}
}
finally
{
if (enumerator != null)
{
enumerator.Dispose();
}
}
return result;
}
This new class helped my utility go from deleting 1K files per second to up to around 2K per second!
HostForLIFE.eu ASP.NET Core 2.2.1 Hosting
European best, cheap and reliable ASP.NET hosting with instant activation. HostForLIFE.eu is #1 Recommended Windows and ASP.NET hosting in European Continent. With 99.99% Uptime Guaranteed of Relibility, Stability and Performace. HostForLIFE.eu security team is constantly monitoring the entire network for unusual behaviour. We deliver hosting solution including Shared hosting, Cloud hosting, Reseller hosting, Dedicated Servers, and IT as Service for companies of all size.
August 6, 2018 11:07 by
PeterHave you ever encountered a scenario when you have to download a few files zipped and compressed? Few developments involving the manipulation of documents and its management would require this. There are a lot of packages out in the market. Here, in this article, I would be sharing the use of DotNetZip package used to zip, unzip & compress files using C#, VB.NET, & any .NET language.
Download the DotNetzip package from NuGet package.
Once downloaded, it's all set to use the DotNetzip package to start zipping the files and compressing them. For the files to be zipped, here I will be using the file path and select each file to be zipped. Here also, we will see how a file is created on the fly (a PDF using Rotativa) is saved in the same folder and zipped.
File created on the fly using Rotativa
var pdfResult = new Rotativa.PartialViewAsPdf("~/Template.cshtml", model) //This is HTML that would be generated as PDF
{
FileName = "Template.pdf"
};
var resultSet = pdfResult.BuildPdf(ControllerContext);
if (resultSet != null) {
string path = Path.Combine(Server.MapPath(subPath));
FileStream fs = new FileStream(path + ".pdf", FileMode.Create, FileAccess.ReadWrite);
BinaryWriter bw = new BinaryWriter(fs);
bw.Write(resultSet);
bw.Close();
}
The above code snippet is generating a PDF using a cshtml Razor View page using Rotativa Using Rotativa Best to follow the mentioned article for more information to generate PDF using Rotativa using MVC. Let's look at the code snippet for zipping.
using(ZipFile zipFile = new ZipFile()) {
//Get all filepath from folder
String[] files = Directory.GetFiles(Server.MapPath("/"));
string fileUniqueName = "Template"
foreach(string file in files) {
if (file.Contains(fileUniqueName.ToString())) {
zipFile.AddFile(file, @ "TemplateDocs_" + DateTime.Now);
//Adding files from filepath into Zip
}
}
Response.ClearContent();
Response.ClearHeaders();
//Set zip file name
Response.AppendHeader("content-disposition", "attachment; filename=TemplatedDocuments.zip");
zipFile.CompressionMethod = CompressionMethod.BZip2;
zipFile.CompressionLevel = Ionic.Zlib.CompressionLevel.BestCompression;
//Save the zip content in output stream
zipFile.Save(outputStream);
}
//Set the cursor to start position
outputStream.Position = 0;
String[] filesToDelete = Directory.GetFiles(Server.MapPath("/"));
foreach(string file in filesToDelete) {
if (file.Contains(fileUniqueName.ToString())) {
FileInfo fi = new FileInfo(file);
fi.Delete();
}
}
return new FileStreamResult(outputStream, fileType);
The above snippet is just required to start zipping and compressing the files. As you can see using block for the ZipFile is created with instantiation of its object.
Then, the files present under the path are navigated using Server.MapPath(""), Once the path is set, the files if with some unique string character in the filename needs to be searched and only zipped, is set to a variable.
Then each file is looped through and added to the ZipFile object, here zipFile.AddFiles(file, ZippedFolderName); ZipFolderName here is the name you set for the folder having all the files after extraction.
There are three compression levels for the ZipFile an enum which describes through code as below,
public enum CompressionMethod {
//
// Summary:
// No compression at all. For COM environments, the value is 0 (zero).
None = 0,
Deflate = 8,
BZip2 = 12
}
The above are the three algorithms used. I personally have used only BZip2 based on few good reviews.
Once compressed and all files inserted into the folder, the zipped folder is ready to be downloaded using the FileStreamResult in MVC action.
This is the simple explanation and the code snippet for the Zip file concept. This is simple and really handy to be used and it also provides the compression algorithms which are good to go with.
HostForLIFE.eu ASP.NET Core 2.2.1 Hosting
European best, cheap and reliable ASP.NET hosting with instant activation. HostForLIFE.eu is #1 Recommended Windows and ASP.NET hosting in European Continent. With 99.99% Uptime Guaranteed of Relibility, Stability and Performace. HostForLIFE.eu security team is constantly monitoring the entire network for unusual behaviour. We deliver hosting solution including Shared hosting, Cloud hosting, Reseller hosting, Dedicated Servers, and IT as Service for companies of all size.