European ASP.NET 4.5 Hosting BLOG

BLOG about ASP.NET 4, ASP.NET 4.5 Hosting and Its Technology - Dedicated to European Windows Hosting Customer

European ASP.NET 4.5 Hosting - UK :: How to Check that .NET has been Installed on the Server

clock November 16, 2015 21:51 by author Scott

Most of the newbies and few administrators handling the deployment of their company’s ASP.Net applications on the Windows Server must be knowing about the basics of how ASP.Net is associated with the IIS web server. Here’s a quick tip for you to quickly check  whether the exact version of .NET framework has been installed on the Server and also to check whether it has been registered with the IIS or not.

In this scenario, I'm going to consider a fresh installation of the Windows Server (2008 R2/ 2012 R2). SO make sure you have the below mentioned configuration done accordingly.

How to Find The Existence of the .NET Framework and Its Files

Navigate to this location, to make sure the .Net Framework that you are wanting/looking for is installed.

File location: (32-bit): C:\Windows\Microsoft.NET\Framework\ (By default)
For 64-bit: C:\Windows\Microsoft.NET\Framework64\ (By default)

There are several .NET Framework versions available. Some are included in some Windows OS by default and all are available to download at Microsoft website as well.

Following is a list of all released versions of .NET Framework:

- .NET Framework 1.0 (Obsolete)
- .NET Framework 1.1 (Obsolete, comes installed in Windows Server 2003)
- .NET Framework 2.0* (Obsolete, comes as a standalone installer)
- .NET Framework 3.0* (comes pre-installed in Windows Vista and Server 2008)
- .NET Framework 3.5* (comes pre-installed in Windows 7 and Server 2008 R2)
- .NET Framework 4.0*
- .NET Framework 4.5* (comes pre-installed in Windows 8/8.1 and Server 2012/2012 R2)

Note: The framework marked with (*) have their later versions which is available as service packs, that can be downloaded from Microsoft’s Download website.

To check the ASP.Net application version compatibility, refer this MSDN article. Which is also shown below

If you find the respective folder, say v4.0.xxx, then it means that the Framework 4.0 or above has been installed. X:\Windows\Microsoft.NET\Framework\v4.0.30319  (The X:\ is replaced by the OS drive)

Also you will find a similar folder for the x64 bit .Net Framework and its files associated in this location X:\Windows\Microsoft.NET\Framework64\v4.0.30319 (The X:\ is replaced by the OS drive)

This can also be confirmed using another method by navigating into the Windows Registry to find a key and its existence confirms the same.

How to Find the .NET Framework Versions by Viewing the Registry

1. On the Start menu, choose Run.

2. In the Open box, enter regedit.exe.

You must have administrative credentials to run regedit.exe.

In the Registry Editor, open the following subkey:

HKEY_LOCAL_MACHINE\SOFTWARE\Microsoft\NET Framework Setup\NDP\v4\Full

This confirms the existence of .Net framework 4 and above(4.5 / 4.5.1 / 4.5.2 Only).

In most of the cases people might ignore this, assuming they have already configured ASP.Net by choosing from the server roles or any other version of .Net application that was working earlier.

This step will guide you to check whether your new application (with respect to the .Net Framework compatibility) has its asp.net component registered or not.

Simply Check ASP.NET 4.5 has been Installed via IIS

To check that .net 4.5 has been installed on the server, please just simply create a website in IIS and hit the “Select” button to check the .Net framework versions available to create Application Pool.

If you find v4.5 instead of v4.0, then it clearly justifies that .Net framework version 4.5 or above (4.5 / 4.5.1 / 4.5.2 only) has been installed and made available to run any website that requires this framework’s version.

If you don't find it, then navigate to the framework’s root folder (refer pic 2) and run “aspnet_regiis.exe” which will in turn register the asp.net component to the IIS.

Once you have registered the ASP.Net component, restart the IIS from the command prompt by typing “iisreset”, then launch your IIS Manager and follow the Step 3, to check the version listed in the available frameworks in the “Add Website” windows as shown above.

Now you are all set to go and start deploying your web application through Web Deploy / FTP or any other.


European ASP.NET 4.5. Hosting - France :: Memory Leak in .Net 4.5

clock November 9, 2015 23:57 by author Scott

One of the common issues with events and event handlers is memory leaks. In applications, it is possible that handlers attached to event sources will not be destroyed if we forget to unregister the handlers from the event. This situation can lead to memory leaks. .Net 4.5 introduces a weak event pattern that can be used to address this issue.

Problem: Without using weak event pattern.

Let's understand the problem with an example. If we understand the problem then the solution is very easy.

public class EventSource  
{  
        public event EventHandler<EventArgs> Event = delegate { };    

        public void Raise()  
        {  
            Event(this, EventArgs.Empty);  
        }          
}    
  

public class EventListener   
{  
        public int Counter { getset; }  
        EventSource eventSourceObject;    

        public EventListener(EventSource source)  
        {  
            eventSourceObject= source;  
            eventSourceObject.Event += MyHandler;  
        }           

        private void MyHandler(object source, EventArgs args)  
        {  
            Counter++;  
            Console.WriteLine("MyHandler received event "+ Counter);  
        }    

        public void UnRegisterEvent()  
        {  
            eventSourceObject.Event -= MyHandler;  
        }  
}  
static void Main(string[] args)  
{              
         EventSource source = new EventSource();  
         EventListener listener = new EventListener(source);  
         Console.WriteLine("Raise event first time");  
         Console.Read();  
         source.Raise();    

         //Set listener to null and call GC to release the  
        //listener object from memory.    

         Console.WriteLine("\nSet listener to null and call GC");  
         Console.Read();  
        //developer forget to unregister the event                 

        //listener.UnRegisterEvent();  
         listener = null;  
         GC.Collect();  
         Console.WriteLine("\nRaise event 2nd time");  
         Console.Read();  
         source.Raise();  
         Console.ReadKey();                  
}  

Output

The developer is expecting that set listener = null is sufficient to release the object but this is not the case. The event listener object is still in memory.

the EventListener's handler should be called a second time. But it's calling.

In this example the developer forget to unregister the event. With this mistake, the listener object is not released from memory and it's still active. If we call the unregister method then the EventListener would be released from memory. But the developer does not remember when to unregister the event.

This is the problem!

Solution: Weak event pattern.

The weak event pattern is designed to solve this memory leak problem. The weak event pattern can be used whenever a listener needs to register for an event, but the listener does not explicitly know when to unregister. 

In the old way of attaching the event with a source it is tightly coupled.

eventSourceObject.Event += MyHandler;  

Using Weak event pattern

Replace the preceding registration with the following code and run the program.

WeakEventManager<EventSource, EventArgs>.AddHandler(source, "Event", MyHandler);

After raising the event a second time, the listener is doing nothing. It means the listener is no longer in memory. 

Now the developer need not be concerned about calling the unregister event.

For any specific scenario if we want to unregister the event then we can use the RemoveHandler method as in the following:

WeakEventManager<EventSource, EventArgs>. RemoveHandler(source, "Event", MyHandler);  


European ASP.NET 4.5 Hosting - France :: Using HTML 5 and ASP.NET to Upload Files

clock December 4, 2014 07:03 by author Scott

ASP.NET web applications that require uploading files from the client machine to the server use the file field to select files. The selected files are uploaded to the server using form submission techniques. In addition to the file field, HTML5 also allows you to select files using drag and drop. Using this feature you can drag files from Windows Explorer or Desktop and drop them on a predefined area of a web page. The files can then be uploaded to the server. This article illustrates how the HTML5 drag and drop feature can be used to upload files on the server.  

Traditionally you use the HTML file field to select files that are to be uploaded to the server. ASP.NET web forms wrap the file field into the FileUpload server control and ASP.NET MVC applications can use an <input> element with type attribute set to file. Another alternative offered by HTML5 is dragging one or more files from Windows Explorer or Desktop and drop them onto some predefined HTML element of a web page. You can then access the dropped files using the dataTransfer object available to drag and drop events.

To understand how files can be selected using the drag and drop features of HTML5, let's develop a new ASP.NET web forms application. The HTML markup of the default web form is shown below:

<form id="form1" runat="server">
<center>
 
<div id="box">Drag & Drop files from your machine on this box.</div>
 
<br />
 
<input id="upload" type="button" value="Upload Selected Files" />
</center>
</form>

As you can see, the <form> consists of a <div> element and a button. The <div> element is intended to drop the files dragged from the local machine. Merely dropping the files won't upload them to the server. Clicking on the button initiates the file upload operation.

To handle the file drop operation you need to wire certain event handlers to the box <div> element. The following jQuery code shows how that can be done:

var selectedFiles; 

$(document).ready(function () {
  var box;
  box = document.getElementById("box");
  box.addEventListener("dragenter", OnDragEnter, false);
  box.addEventListener("dragover", OnDragOver, false);
  box.addEventListener("drop", OnDrop, false);
...
}

The code declares a global variable named selectedFiles for storing a list of selected files. The ready() function wires three event handler functions to the respective events of the box <div> element, viz. dragenter, dragover and drop using addEventListener() method. The first parameter of the addEventListener() method is the event name and the second parameter is the event handler function. The event handler functions are shown below:

function OnDragEnter(e) {
  e
.stopPropagation();
  e
.preventDefault();
} 

function OnDragOver(e) {
  e
.stopPropagation();
  e
.preventDefault();
} 

function OnDrop(e) {
  e
.stopPropagation();
  e
.preventDefault();
  selectedFiles
= e.dataTransfer.files;
  $
("#box").text(selectedFiles.length + " file(s) selected for uploading!");
}

The OnDragEnter() and OnDragOver() event handler functions are simple and they merely prevent the event bubbling of the respective events. The OnDrop() function is important since it handles the drop event. The list of files dragged and dropped on the <div> element is obtained using the files property of the dataTransfer object. The files object is of type FileList and each item of the FileList collection is of type File. These two objects are available as a part of the HTML5 File API. The OnDrop() function stores the selected files in the global variable - selectedFiles and displays a message in the <div> using the text() method that indicates the number of files selected. The following figure shows how the default web form looks after dragging and dropping files on the <div> element.

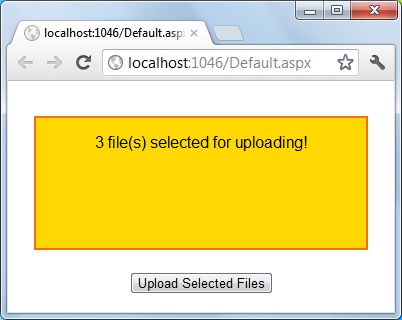
Default web form after dragging and dropping files to the <div> element

How to Send Files to the Servere?

To send the selected files from the client to the server you can use different techniques but in this example you will use jQuery $.ajax() method for uploading the files. The following code shows how $.ajax() method can be used for this purpose.

$("#upload").click(function () {
  var data = new FormData();
  for (var i = 0; i < selectedFiles.length; i++) {
    data.append(selectedFiles[i].name, selectedFiles[i]);
  }
  $.ajax({
    type: "POST",
    url: "FileHandler.ashx",
    contentType: false,
    processData: false,
    data: data,
    success: function (result) {
      alert(result);
    },
    error: function () {
      alert("There was error uploading files!");
    }
  });
});

The code shown above first creates a FormData object. The FormData object encapsulates form's data that you wish to send to the server. All the selected files are added to the FormData object using its append() method. The first parameter of the append() method is the name of the file being added and the second parameter is the File object itself. Once the FormData object is ready you make a POST request to a Generic ASP.NET Handler (FileHandler.ashx) using jQuery $.ajax() method. You will create the generic handler in the next section.

The type of the request is POST. The url is FileHandler.ashx. Notice that the processData option is set to false. By default when you use the $.ajax() method the data is sent in URL encoded format. To prevent this behavior processData is set to false. The data option  is set to the FormData object created earlier. The success function simply displays the message returned by the generic handler. The error handler function displays an error message in case there is any error while calling FileHandler.ashx.

Receive the Uploaded Files

The ASP.NET generic handler - FileHandler.ashx - receives the files sent by the $.ajax() method. The generic handler also saves them to a folder on the server. The following code shows how the handler accomplishes this task:

public void ProcessRequest(HttpContext context)
{
   
if (context.Request.Files.Count > 0)
   
{
       
HttpFileCollection files = context.Request.Files;
       
foreach (string key in files)
       
{
           
HttpPostedFile file = files[key];
           
string fileName = file.FileName;
            fileName
= context.Server.MapPath("~/uploads/" + fileName);
            file
.SaveAs(fileName);
       
}
   
}
    context
.Response.ContentType = "text/plain";
    context
.Response.Write("File(s) uploaded successfully!");
}

The ProcessRequest() method of the FileHandler.ashx is called when the files are sent to the server using the $.ajax() method. The uploaded files can be accessed using the Files collection of the Request object. Each item inside the Files collection is of type HttpPostedFile. A foreach loop iterates through all the files from the Files collection and saves the individual file using the SaveAs() method of HttpPostedFile class. Once all files are saved a success message is sent to the client.

Note that by default ASP.NET sets request length to 4096 bytes. If you wish to upload large files you may adjust the request length using web.config file as shown below:

<httpRuntime
  
maxRequestLength="20000"
  
requestValidationMode="4.5"
  
targetFramework="4.5"
  
encoderType="..." />

As you can see the maxRequestLength attribute of the <httpRuntime> section is set to 20000 bytes. You need to adjust this value as per your requirement.

That's it! You can now run the web form, drag and drop files on the <div> element and click on the "Upload Selected Files" button to upload them on the server. 


UK ASP.NET 4.5.2 Hosting - HostForLIFE.eu :: How to Use NServiceBus with ASP.NET SignalR ?

clock November 24, 2014 06:35 by author Peter

In this tutorial, I will tell you how to use NServiceBus with ASP.NET SignalR. In detail right listed below what I'm planning to do is periodically publish an event utilizing NServiceBus. I will be able to use a ASP.NET MVC application as my front end and there I will be able to use a an additional NServiceBus client and that is liable for capturing event broadcasted from the NServiceBus publisher. Then working with ASP.NET SignalR, I will certainly be updating the UI with others captured events content.

First, Add a new ASP. NET MVC application to the solution.

Currently I'm running NServiceBus. Host and Microsoft ASP. NET SignalR nuget packages on ASP. NET MVC project using Package Manager Console. NServiceBus. Host can add the EndpointConfig. cs towards the project and I'm keeping as it's. Currently I'm making a folder named “SignalR” within my project and I'm heading to add a brand new category there named “EventMessageHandler”.
public class EventMessageHandler : IHandleMessages<MyMessage>
{
    public void Handle(MyMessage message)
    { 
    }
}

When the NServiceBus has revealed an event of kind “MyMessage”, “Handle” method in “EventMessageHandler” class can tackle it. For the moment, lets maintain the “Handle” method empty and let’s add a OWIN Startup class towards the project by right clicking upon the App_Start folder and selecting a OWIN Startup class template.

Next step, I am modifying the created OWIN Startup class with these code:
using Owin;
using Microsoft.Owin;
using NServiceBus; 
[assembly: OwinStartup(typeof(NServiceBusSignalRSample.Startup))]
namespace NServiceBusSignalRSample
{
    public class Startup
    {
        public static IBus Bus { get; private set; } 
        public static void Configuration(IAppBuilder app)
        {
            Bus = Configure
                    .With()
                    .DefaultBuilder()
                    .DefiningEventsAs(t => t.Namespace != null && t.Namespace.StartsWith("NServiceBusSignalRSample.Messages"))
                    .PurgeOnStartup(false)
                    .UnicastBus()
                    .LoadMessageHandlers()
                    .CreateBus()
                    .Start(); 
            app.MapSignalR();
        }
    }
}


Right listed below I've configured my NServiceBus host and I'm mapping SignalR hubs towards the app builder pipeline. Next action is to make a SignalR hub. For the I'm adding the listed class towards the previously produced “SignalR” folder.

public class MyHub : Hub{
    public void Send(string name, string message)
    {
        Clients.All.addNewMessageToPage(name, message);
    }
}

Currently right listed below I'm deriving “MyHub” class from “Hub” and I ve got a method there named “Send” that takes 2 parameters. Within the method, I'm calling the consumer aspect “addNewMessageToPage” that still I haven’t wrote.

Just before starting off using the client aspect code, let’s modify the “Handle” method in “EventMessageHandler” class now to call my hubs’ send method.
public class EventMessageHandler : IHandleMessages<MyMessage>
{
    public void Handle(MyMessage message)
    {
        IHubContext hubContext = GlobalHost.ConnectionManager.GetHubContext<MyHub>();
        hubContext.Clients.All.addNewMessageToPage(message.Message, "Peter");
    }
}

Next,  I'm ready along with the back end code. Final thing to become done is to make a view in client side, initiate the hub connection and build a method named “addNewMessageToPage”. For the first I'm modifying the “HomeController” and adding a brand new Action there named “SignalR”.
public ActionResult SignalR()
{
    return View();
}

Then I'm correct clicking upon the Motion and making a new view along with a similar name “SignalR”. I'm modifying the “SignalR” view as follows.
@{
    ViewBag.Title = "SignalR";
}
<h2>SignalR</h2> 
<div class="container">
    <ul id="output"></ul>
</div> 
@section scripts {
    <script src="~/Scripts/jquery.signalR-2.1.1.min.js"></script>
    <script src="~/signalr/hubs"></script>
     <script>       
       $(function () {
            $.connection.hub.logging = true;
            $.connection.hub.start();
            var chat = $.connection.myHub; 
            chat.client.addNewMessageToPage = function (message, name) {
$('#output').append('<li>' + message + ' ' + name + '</li>');          
 };
        });
    </script>
}

Now I'm ready. One last factor to become done is to line multiple startup projects.

Finally, I'm running the Apps. Hope this post works for you!


ASP.NET 4.5.2 Hosting Germany - HostForLIFE.eu :: Learn How to Add or Update Record with GridView control in ASP.NET

clock November 21, 2014 05:08 by author Peter

A Gridview is really a control for displaying and manipulating data from completely different data sources. It shows data from a sort of data sources inside a tabular format. Rather than boundfiled, I like to make use of TemplateField coz of the simplicity. In this article I am going to implement how to Add, Update, Delete selected record from GirdView control in ASP.NET 4.5.2

This the code for Add new record from footer and Update the selected row.

Default.aspx:
<asp:gridview allowpaging="True" autogeneratecolumns="False" cellpadding="4" forecolor="#333333" gridlines="None" id="gvstatus" onpageindexchanging="gvstatus_PageIndexChanging" onrowcancelingedit="gvstatus_RowCancelingEdit" onrowcommand="gvstatus_RowCommand" onrowediting="gvstatus_RowEditing" onrowupdating="gvstatus_RowUpdating" onselectedindexchanged="gvstatus_SelectedIndexChanged" runat="server" showfooter="True" width="600px">
            <columns>
 <asp:templatefield headerstyle-horizontalalign="Left" headertext="SrNo ">
            <itemtemplate>
                    &lt;%# Container.DataItemIndex + 1 %&gt;
                </itemtemplate>
 </asp:templatefield>

 <asp:templatefield headertext="ID" visible="false">
      <itemtemplate>
      <asp:label columnname_id="" id="lblid" runat="server" text="&lt;%# Bind(">"&gt; </asp:label>
     </itemtemplate>
</asp:templatefield>
<asp:templatefield headertext="EmpName">
      <itemtemplate>
        <asp:label columnname_empname="" id="lblEmpName" runat="server" text="&lt;%# Bind(">"&gt;</asp:label>
       </itemtemplate>
       <edititemtemplate>
           <asp:textbox id="txtEmpName" runat="server" text="&lt;%# Bind(&quot;columnname_EmpName&quot;) %&gt;"></asp:textbox>
        </edititemtemplate>
        <footertemplate>
              <asp:textbox id="txtfEmpName" runat="server"></asp:textbox>
        </footertemplate>
</asp:templatefield>
 <asp:templatefield headertext="empSalary">
        <itemtemplate>
           <asp:label id="lblempSalary" runat="server" text="&lt;%# Bind(&quot;columnname_EmpSalary&quot;) %&gt;"></asp:label>
        </itemtemplate>
        <edititemtemplate>
             <asp:textbox id="txtempSalary" runat="server" text="&lt;%# Bind(&quot;columnname_EmpSalary&quot;) %&gt;"></asp:textbox>
         </edititemtemplate>
         <footertemplate>
            <asp:textbox id="txtfempSalary" runat="server"></asp:textbox>
         </footertemplate>
</asp:templatefield>
 <asp:templatefield itemstyle-width="190px" showheader="False">
         <itemtemplate>
             <asp:button causesvalidation="False" commandname="Edit" id="btnedit" runat="server" text="Edit"></asp:button>
          </itemtemplate>
          <edititemtemplate>
               <asp:button causesvalidation="True" commandname="Update" id="btnupdate" runat="server" text="Update"></asp:button>
                        &nbsp;<asp:button causesvalidation="False" commandname="Cancel" id="btncancel" runat="server" text="Cancel"></asp:button>
         </edititemtemplate>
        <footertemplate>
            <asp:button commandname="Add" id="btnadd" runat="server" text="Add">
        </asp:button></footertemplate>
 </asp:templatefield>
            </columns>
            <pagerstyle backcolor="#A86E07" forecolor="White" horizontalalign="Center">
            <selectedrowstyle backcolor="#E2DED6" font-bold="True" forecolor="#333333">
          <headerstyle backcolor="#A86E07" font-bold="True" forecolor="White">
        <editrowstyle backcolor="#d9d9d9">
    <alternatingrowstyle backcolor="White" forecolor="#A86E07">
 </alternatingrowstyle></editrowstyle></headerstyle></selectedrowstyle>
</pagerstyle>
</asp:gridview>

CodeBehind:
protected void Page_Load(object sender, EventArgs e)
    {
       if (!Page.IsPostBack)
       {
         gvBind(); //Bind gridview
       }
     }
public void gvBind()
{   
SqlDataAdapter dap = new SqlDataAdapter("select id, empName,empSalary from myTable", conn);    DataSet ds = new DataSet();
     dap.Fill(ds);
     gvstatus.DataSource = ds.Tables[0];
     gvstatus.DataBind();
}
Update the select row from girdview
protected void gvstatus_RowUpdating(object sender, GridViewUpdateEventArgs e)
    {
        lblmsg.Text = "";
        try
        {
            GridViewRow row = (GridViewRow)gvstatus.Rows[e.RowIndex];
            Label lblid = (Label)gvstatus.Rows[e.RowIndex].FindControl("lblid");
            TextBox txtname = (TextBox)gvstatus.Rows[e.RowIndex].FindControl("txtEmpName");
            TextBox txtSalary = (TextBox)gvstatus.Rows[e.RowIndex].FindControl("txtempSalary");
            string empName = txtname.Text;
            string empSalary = txtSalary.Text;
            string lblID=lblid.Text;
            int result = UpdateQuery(empName, empSalary,lblID);
            if (result > 0)
            {
                lblmsg.Text = "Record is updated successfully.";
            }
            gvstatus.EditIndex = -1;
            gvBind();
        }
        catch (Exception ae)
        {
            Response.Write(ae.Message);
        }
    }

And this is the Code that I used to add new record into database form GirdView footer
  protected void gvstatus_RowCommand(object sender, GridViewCommandEventArgs e)   
{       
        if (e.CommandName == "Add")
        {
            string empName = ((TextBox)gvstatus.FooterRow.FindControl("txtfempName")).Text;
            string empSalry = ((TextBox)gvstatus.FooterRow.FindControl("txtfempSalary")).Text;
            int result = InsertNewRecord(empName, empSalry);
            if (result > 0)
            {
                lblmsg.Text = "Record is added successfully.";
            }
            gvstatus.EditIndex = -1;
            gvBind();
        }
    }
protected void gvstatus_RowCancelingEdit(object sender, GridViewCancelEditEventArgs e)
{
 gvstatus.EditIndex = -1;
 gvBind();
}
 protected void gvstatus_RowEditing(object sender, GridViewEditEventArgs e)
{
 lblmsg.Text = "";
 gvstatus.EditIndex = e.NewEditIndex;
 gvBind();
}
public void UpdateQuery(string empName, string empSalary, string lblID)
{
 SqlCommand cmd = new SqlCommand("update myTable set empName='" + empName + "',empSalary='" + empSalary + "' where  id='" + lblID + "'", conn);
 conn.Open();
 int temp = cmd.ExecuteNonQuery();
 conn.Close();
 return temp;
}
public void InsertNewRecord(string empName, string empSalary)
{
 SqlCommand cmd = new SqlCommand("your insert query ", conn);
 conn.Open();
 int temp = cmd.ExecuteNonQuery();
 conn.Close();
 return temp;
}


ASP.NET 4.5.2 Hosting UK - HostForLIFE.eu :: How to Create PDF from DataTable in ASP.NET 4.5.2 ?

clock November 17, 2014 05:58 by author Peter

With this article, i'm explaining you learn how to create PDF File from datatable with ASP.NET 4.5.2. I'm passing a DataTable during this function and code to convert this in pdf file. I'm working with iTextSharp you'll be able to download it from internet. It totally free. you will need to make an easy ASP.NET page and have data from database. Then pass it to ExportToPDF method. We are able to established PDF page margins, alter page orientation (portrait, landscape), custaomize headers and footers add page numbers and a lot of. Carry out a few R & D along with iTextSharp.

And here is the code that I use to create PDF file from DataTable:
public void ExportToPdf(DataTable myDataTable) 
   {     
     Document pdfDoc = new Document(PageSize.A4, 10, 10, 10, 10); 
     try 
     { 
       PdfWriter.GetInstance(pdfDoc, System.Web.HttpContext.Current.Response.OutputStream); 
       pdfDoc.Open(); 
       Chunk c = new Chunk("" + System.Web.HttpContext.Current.Session["CompanyName"] + "", FontFactory.GetFont("Verdana", 11)); 
       Paragraph p = new Paragraph(); 
       p.Alignment = Element.ALIGN_CENTER; 
       p.Add(c); 
       pdfDoc.Add(p); 
       string clientLogo = System.Web.HttpContext.Current.Session["CompanyName"].ToString(); 
       clientLogo = clientLogo.Replace(" ", ""); 
       string clogo = clientLogo + ".jpg"; 
       string imageFilePath = System.Web.HttpContext.Current.Server.MapPath("../ClientLogo/" + clogo + ""); 
       iTextSharp.text.Image jpg = iTextSharp.text.Image.GetInstance(imageFilePath); 
       //Resize image depend upon your need  
       jpg.ScaleToFit(80f, 60f); 
       //Give space before image  
       jpg.SpacingBefore = 0f; 
       //Give some space after the image  
       jpg.SpacingAfter = 1f; 
       jpg.Alignment = Element.HEADER; 
       pdfDoc.Add(jpg); 
       Font font8 = FontFactory.GetFont("ARIAL", 7); 
       DataTable dt = myDataTable; 
       if (dt != null) 
       { 
         //Craete instance of the pdf table and set the number of column in that table 
         PdfPTable PdfTable = new PdfPTable(dt.Columns.Count); 
         PdfPCell PdfPCell = null; 
         for (int rows = 0; rows < dt.Rows.Count; rows++) 
         { 
           for (int column = 0; column < dt.Columns.Count; column++)  
           { 
             PdfPCell = new PdfPCell(new Phrase(new Chunk(dt.Rows[rows][column].ToString(), font8))); 
             PdfTable.AddCell(PdfPCell); 
           } 
         } 
         //PdfTable.SpacingBefore = 15f; // Give some space after the text or it may overlap the table           
         pdfDoc.Add(PdfTable); // add pdf table to the document  
       } 
       pdfDoc.Close(); 
       Response.ContentType = "application/pdf"; 
       Response.AddHeader("content-disposition", "attachment; filename= SampleExport.pdf"); 
       System.Web.HttpContext.Current.Response.Write(pdfDoc); 
       Response.Flush(); 
       Response.End(); 
       //HttpContext.Current.ApplicationInstance.CompleteRequest(); 
     } 
     catch (DocumentException de) 
     { 
       System.Web.HttpContext.Current.Response.Write(de.Message); 
     } 
     catch (IOException ioEx) 
     { 
       System.Web.HttpContext.Current.Response.Write(ioEx.Message); 
     } 
     catch (Exception ex) 
     { 
       System.Web.HttpContext.Current.Response.Write(ex.Message); 
     } 
   } 


ASP.NET 4.5.2 Hosting with Paris (France) Server - HostForLIFE.eu :: How to Resize Image With Maintain The Ratio in ASP.NET 4.5.2 ?

clock November 14, 2014 04:54 by author Peter

Now, I am going to tell you how to Re-size Image along with maintain the ration employing ASP.NET 4.5.2 and C# code. Sometimes we must store totally different size images to get a certain images as applied to e-commerce web page. for that we both re-size the image and save multiple images collectively small, medium along with a full size image. Other then When we've got issue relating to space having very fine performance server then we are able to use dynamically re-sizing of image merely save only huge image then when want to utilize re-size it in run time when you need.

For achieving this process I generate a code that response the re-size image. I utilize it for jpg and png images not for gif. Call the page in which code for image merging :
Image1.ImageUrl = "dynamicimage.aspx";

And this is the Code for image generation and merging (dynamicimage.aspx or dynamicimage.aspx.cs) using System.Drawing;
using System.Drawing.Drawing2D;
using System.Drawing.Imaging;
using System.IO;
protected void Page_Load(object sender, EventArgs e)
{
  string testimage = Server.MapPath(@"images/hemant_image.jpg");
  getimage(testimage, 400, 400); 
  // can set imageurl, max-width and max-height using query string...
}
public void getimage(string ThumbnailPath, int maxwidth, int maxheight)
{
    System.Drawing.Image image = System.Drawing.Image.FromFile(ThumbnailPath);
    Size ThumbNailSize = setimagesize(maxwidth, maxheight, image.Width, image.Height);
    System.Drawing.Image ImgThnail = new Bitmap(ThumbNailSize.Width, ThumbNailSize.Height);
    System.Drawing.Graphics graphics = System.Drawing.Graphics.FromImage(ImgThnail);  
    graphics.InterpolationMode = InterpolationMode.HighQualityBicubic;
    graphics.SmoothingMode = SmoothingMode.HighQuality;
    graphics.PixelOffsetMode = PixelOffsetMode.HighQuality;
    graphics.CompositingQuality = CompositingQuality.HighQuality;
    graphics.DrawImage(image, 0, 0, ThumbNailSize.Width, ThumbNailSize.Height);
    ImageCodecInfo[] info = ImageCodecInfo.GetImageEncoders();
    EncoderParameters encoderParameters;
    encoderParameters = new EncoderParameters(1);
    encoderParameters.Param[0] = new EncoderParameter(System.Drawing.Imaging.Encoder.Quality, 100L);
    string sExt = System.IO.Path.GetExtension(ThumbnailPath);
    if (sExt.ToString() == ".png")  
  {
        Response.ContentType = "image/png";
        ImgThnail.Save(Response.OutputStream, image.RawFormat);
    }
    else
    {
        Response.ContentType = "image/jpeg";
        ImgThnail.Save(Response.OutputStream, info[1], encoderParameters);
    }
    image.Dispose();
}
// below code is my old one for calculating height and width with maintain image ratio.
public Size setimagesize(int maxwidth, int maxheight, int OriginalWidth, int OriginalHeight)
{
    Size NewSize = new Size();
    int sNewWidth = OriginalWidth;
    int sNewHeight = OriginalHeight;
    int tempheight = 0;
    int tempwidht = 0;
    if (OriginalWidth >= OriginalHeight)
    {
        if (OriginalWidth >= maxwidth)
        {
            sNewWidth = maxwidth;
            sNewHeight = OriginalHeight * maxwidth / OriginalWidth;
        }
        if (sNewHeight > maxheight)
        {
            tempheight = sNewHeight;
            sNewHeight = maxheight;
            sNewWidth = sNewWidth * maxheight / tempheight;
        }
    }
    else
    {
        if (OriginalHeight >= maxheight)
        {
            sNewHeight = maxheight;
            sNewWidth = OriginalWidth * maxheight / OriginalHeight;
        }
        if (sNewWidth > maxwidth)
        {
            tempwidht = sNewWidth;
            sNewWidth = maxwidth;
            sNewHeight = sNewHeight * maxwidth / tempwidht;
        }
    }
    NewSize = new Size(sNewWidth, sNewHeight);
    return NewSize;
}


ASP.NET 4.5.2 Hosting UK - HostForLIFE.eu :: How to Display Local Current Time use JavaScript in ASP.NET

clock November 3, 2014 10:38 by author Peter

In this tutorial, I’ll explain How to Display Local Current Time using JavaScript in ASP.NET 4.5.2 without page refresh in your website. We can show a clock which is able to be showing the local time of the client’s laptop by using JavaScript.

Show/Display local computer Time use JavaScript
Following is the JavaScript function to indicate current time on webpage like clock:

<script type="text/javascript">
function DisplayCurrentTime() {
var dt = new Date();
var refresh = 1000; //Refresh rate 1000 milli sec means 1 sec
var cDate = (dt.getMonth() + 1) + "/" + dt.getDate() + "/" + dt.getFullYear();
document.getElementById('cTime').innerHTML = cDate + " – " + dt.toLocaleTimeString();
window.setTimeout('DisplayCurrentTime()', refresh);
}
</script>

Here is the complete code for your .aspx site:
<html xmlns="http://www.w3.org/1999/xhtml">
<head>
<title>Webblogsforyou.com | Show/Display Local Computer's Current time in webpage using
JavaScript </title>
<script type="text/javascript">
function DisplayCurrentTime() {
var dt = new Date();
var refresh = 1000; //Refresh rate 1000 milli sec means 1 sec
var cDate = (dt.getMonth() + 1) + "/" + dt.getDate() + "/" + dt.getFullYear();
document.getElementById('cTime').innerHTML = cDate + " – " + dt.toLocaleTimeString();
window.setTimeout('DisplayCurrentTime()', refresh);
}
</script>
</head>
<body onload="DisplayCurrentTime();">
<form id="form1" runat="server">
<h4>
Show/Display Local Computer's Current time in webpage using JavaScript</h4>
<div>
<asp:Label ID="cTime" runat="server" ClientIDMode="Static" BackColor="#ffff00"
Font-Bold="true" />
</div>
</form>
</body>
</html>

As you'll be able to see from on top of sample code, I called DisplayCurrentTime() method on onload event of body tag that loads this local system time, set the interval for each one seconds and refresh current time without page refresh to show on the webpage.


ASP.NET 4.5.2 Hosting UK - HostForLIFE.eu :: Disabling the Tooltip Property in ASP.NET

clock October 27, 2014 09:33 by author Peter

A tooltip is a little pop-up window that seems when a user pauses the mouse pointer over a part, like over a Button. In this tutorial, I will show you how to disable the Tooltip in ASP.NET 4.5.2. Take a glance at the code below:

JavaScript
<html xmlns="http://www.w3.org/1999/xhtml">
<head runat="server">
    <title></title>
    <script type="text/javascript">
        function DisableToolTip() {
            // Get the object
            var obj = document.getElementById('LnkBtn');
            // set the tool tip as empty
            obj.title = "";
        }
    </script>
</head>
<body>
    <form id="form1" runat="server">
    <asp:LinkButton runat="server" Text="Simple Link Button" ToolTip="Simple Button with Tool Tip" ID="LnkBtn" ClientIDMode="Static" ></asp:LinkButton>
   <a href="#" id="lnkDisable" onclick="DisableToolTip();">Disable Tool Tip</a>
    </form>
</body>
</html>

JQuery

<html xmlns="http://www.w3.org/1999/xhtml">
<head runat="server">    
<title></title>
    <script src="Scripts/jquery-1.4.1.min.js" type="text/javascript"></script>
    <script type="text/javascript">
        $(document).ready(function () {
            $("#lnkDisable").click(function () { $('#LnkBtn').attr({'title':''}); });
        });
    </script>
</head>
<body>
    <form id="form1" runat="server">
    <asp:LinkButton runat="server" Text="Simple Link Button" ToolTip="Simple Button with Tool Tip" ID="LnkBtn" ClientIDMode="Static" ></asp:LinkButton>
    <a href="#" id="lnkDisable">Disable Tool Tip</a>
    </form>
</body>
</html>


ASP.NET 4.5 Hosting - HostForLIFE.eu :: How to use jQuery Ajax in ASP.NET

clock October 24, 2014 06:42 by author Peter

Today, I want to show you How to use jQuery Ajax in ASP.NET 4.5. jQuery permits you to call server-side ASP.NET methods from the client side with none PostBack. truly it's an Ajax call to the server however it permits us to decision call or function defined server-side. The code snippet below describes the syntax of the call.

$.ajax({
        type: "POST",
        url: "CS.aspx/MethodName",
        data: '{name: "' + $("#<%=txtUserName.ClientID%>")[0].value + '" }',
        contentType: "application/json; charset=utf-8",
        dataType: "json",
        success: OnSuccess,
        failure: function (response) {
            alert(response.d);
        }
    }); 
HTML Markup
<div>
    Your Name :
    <asp:textbox id="txtUserName" runat="server"></asp:textbox>
    <input id="btnGetTime" type="button" value="Show Current Time" onclick="ShowCurrentTime()" />
</div>

As you can see in the preceding I have added a TextBox when the user enters his name and a TML button that calls a JavaScript method to get the Current Time.
Methods  used on Client Side
<script src="scripts/jquery-1.3.2.min.js" type="text/javascript"></script>
<script type="text/javascript">
    function ShowCurrentTime() {
        $.ajax({
            type: "POST",
            url: "CS.aspx/GetCurrentTime",
            data: '{name: "' + $("#<%=txtUserName.ClientID%>")[0].value + '" }',
            contentType: "application/json; charset=utf-8",
            dataType: "json",
            success: OnSuccess,
            failure: function (response) {
                alert(response.d);
            }
        });
    }
    function OnSuccess(response) {
        alert(response.d);
    }
</script>

That ShowCurrentTime method above makes an AJAX call to the server. That method will executes the GetCurrentTime and accepts the username then returns a string value.
This is the Server-Side Methods
C#
  [System.Web.Services.WebMethod]
    public static string GetCurrentTime(string name)
    {
        return "Hello " + name + Environment.NewLine + "The Current Time is: "
       + DateTime.Now.ToString();   
  }

VB.Net
<System.Web.Services.WebMethod()> _
ublic Shared Function GetCurrentTime(ByVal name As String) As String
   Return "Hello " & name & Environment.NewLine & "The Current Time is: " & _           
DateTime.Now.ToString()
End Function


The preceding method merely returns a acknowledgment message to the user along side the current server time. a vital factor to notice is that the method is declared as static (C#) or Shared (VB.Net) and also it's declared as a web method since unless you are doing this you will not be ready to decision the methods.


About HostForLIFE.eu

HostForLIFE.eu is European Windows Hosting Provider which focuses on Windows Platform only. We deliver on-demand hosting solutions including Shared hosting, Reseller Hosting, Cloud Hosting, Dedicated Servers, and IT as a Service for companies of all sizes.

We have offered the latest Windows 2016 Hosting, ASP.NET Core 2.2.1 Hosting, ASP.NET MVC 6 Hosting and SQL 2017 Hosting.


Tag cloud

Sign in