Code-First configures all entities to do the CRUD operations using direct table access. Using Entity Framework 6.0 and above, we can configure our code first model to use a Stored Procedure for a few or all entities of the model.
Stored Procedure Mapping
To use a Stored Procedure with the Code First model, we need to override the OnModelCreating method of DBContext and add the following code to map the Stored Procedure.
protected override void OnModelCreating(DbModelBuilder modelBuilder)
{
modelBuilder.Entity<yourEntity>().MapToStoredProcedures();
}
The MapToStoreProcedures method has two overloaded methods, one method is without a parameter. This method uses Entity Framework code-first conventions to set up the Stored Procedure. The another method takes an action method as an input and allows us to customize the Stored Procedure name, parameter, schema name and so on.

By default an insert Stored Procedure has a parameter for every property except the properties marked as store generated (identity and computed). This Stored Procedure returns the value of the store generated column. An Update Stored Procedure has a parameter for every property except properties marked as a store generated (computed only). This Stored Procedure returns the result set with computed properties. Delete Stored Procedure has a parameter that is part of the entity key. This Stored Procedure returns nothing.
Example
See this following classes:
public class DepartmentMaster
{
[Key]
[DatabaseGenerated(DatabaseGeneratedOption.Identity)]
public int DepartmentId { get; set; }
public string Code { get; set; }
public string Name { get; set; }
public List<EmployeeMaster> Employees { get; set; }
}
public class EmployeeMaster
{
[Key]
[DatabaseGenerated(DatabaseGeneratedOption.Identity)]
public int EmployeeId { get; set; }
public string Code { get; set; }
public string Name { get; set; }
public int DepartmentId { get; set; }
public DepartmentMaster Department { get; set; }
}
My context class is as in the following. In this class, I overrode the OnModelCreating method to map the Stored Procedure with the EmployeeMaster entity.
public class EntitiesContext : DbContext
{
public EntitiesContext() : base("name=Entities")
{
}
public DbSet<DepartmentMaster> Departments { get; set; }
public DbSet<EmployeeMaster> Employees { get; set; }
protected override void OnModelCreating(DbModelBuilder modelBuilder)
{
modelBuilder.Entity<EmployeeMaster>()
.MapToStoredProcedures(s => s.Insert(u => u.HasName("InsertEmployee", "dbo"))
.Update(u => u.HasName("UpdateEmployee", "dbo"))
.Delete(u => u.HasName("DeleteEmployee", "dbo"))
);
}
}
Enable Migration
Run this command:
enable-migrations -ContextTypeName CodeFirstStoredProcedure.EntitiesContext -MigrationsDirectory:EntitiesMigrations

Migration Configuration
Add-Migration -configuration CodeFirstStoredProcedure.EntitiesMigrations.Configuration InitialEntities
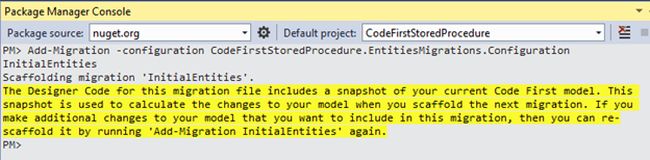
The add migration command generates a Dbmigration class. This DB Migration class has the definition for all the Stored Procedures.
public partial class InitialEntities : DbMigration
{
public override void Up()
{
CreateStoredProcedure(
"dbo.InsertEmployee",
p => new
{
Code = p.String(),
Name = p.String(),
DepartmentId = p.Int(),
},
body:
@"INSERT [dbo].[EmployeeMasters]([Code], [Name], [DepartmentId])
VALUES (@Code, @Name, @DepartmentId)
DECLARE @EmployeeId int
SELECT @EmployeeId = [EmployeeId]
FROM [dbo].[EmployeeMasters]
WHERE @@ROWCOUNT > 0 AND [EmployeeId] = scope_identity()
SELECT t0.[EmployeeId]
FROM [dbo].[EmployeeMasters] AS t0
WHERE @@ROWCOUNT > 0 AND t0.[EmployeeId] = @EmployeeId"
);
CreateStoredProcedure(
"dbo.UpdateEmployee",
p => new
{
EmployeeId = p.Int(),
Code = p.String(),
Name = p.String(),
DepartmentId = p.Int(),
},
body:
@"UPDATE [dbo].[EmployeeMasters]
SET [Code] = @Code, [Name] = @Name, [DepartmentId] = @DepartmentId
WHERE ([EmployeeId] = @EmployeeId)"
);
CreateStoredProcedure(
"dbo.DeleteEmployee",
p => new
{
EmployeeId = p.Int(),
},
body:
@"DELETE [dbo].[EmployeeMasters]
WHERE ([EmployeeId] = @EmployeeId)"
);
}
public override void Down()
{
DropStoredProcedure("dbo.DeleteEmployee");
DropStoredProcedure("dbo.UpdateEmployee");
DropStoredProcedure("dbo.InsertEmployee");
}
}
Update Database
Update-Database -configuration:CodeFirstStoredProcedure.EntitiesMigrations.Configuration –Verbose
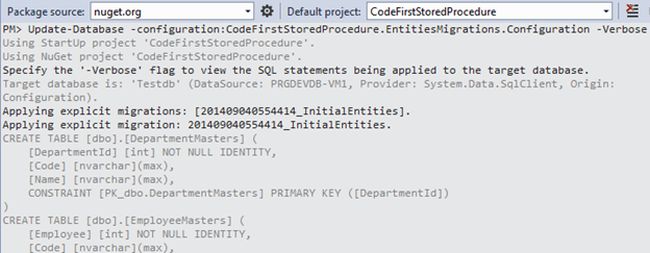
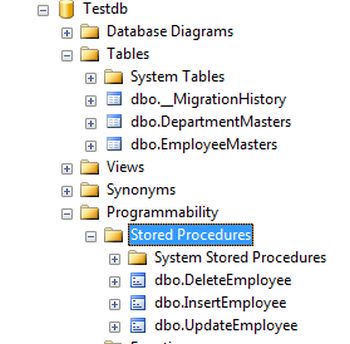
Update database command creates tables and Stored Procedure and definition of the Stored Procedure is as the following:
CREATE PROCEDURE [dbo].[InsertEmployee]
@Code [nvarchar](max),
@Name [nvarchar](max),
@DepartmentId [int]
AS
BEGIN
INSERT [dbo].[EmployeeMasters]([Code], [Name], [DepartmentId])
VALUES (@Code, @Name, @DepartmentId)
DECLARE @EmployeeId int
SELECT @EmployeeId = [EmployeeId]
FROM [dbo].[EmployeeMasters]
WHERE @@ROWCOUNT > 0 AND [EmployeeId] = scope_identity()
SELECT t0.[EmployeeId]
FROM [dbo].[EmployeeMasters] AS t0
WHERE @@ROWCOUNT > 0 AND t0.[EmployeeId] = @EmployeeId
END
GO
CREATE PROCEDURE [dbo].[UpdateEmployee]
@EmployeeId [int],
@Code [nvarchar](max),
@Name [nvarchar](max),
@DepartmentId [int]
AS
BEGIN
UPDATE [dbo].[EmployeeMasters]
SET [Code] = @Code, [Name] = @Name, [DepartmentId] = @DepartmentId
WHERE ([EmployeeId] = @EmployeeId)
END
GO
CREATE PROCEDURE [dbo].[DeleteEmployee]
@EmployeeId [int]
AS
BEGIN
DELETE [dbo].[EmployeeMasters]
WHERE ([EmployeeId] = @EmployeeId)
END
Test Code
In the test code, I am inserting a record into the EmployeeMaster table:
static void Main(string[] args)
{
using (EntitiesContext context = new EntitiesContext())
{
EmployeeMaster employee = new EmployeeMaster();
employee.Code = "A0001";
employee.Name = "Roland Baltimore ";
employee.DepartmentId = 1;
context.Employees.Add(employee);
context.SaveChanges();
Console.ReadLine();
}
}
The Interception/SQL logging feature is introduced in Entity Framework 6. Entity Framework, sends commands (or an equivalent SQL query) to the database to do a CRUD operation and this command can be intercepted by application code of Entity Framework. This feature of the Entity Framework is to capture an equivalent SQL query generated by Entity Framework internally and provide it as output. The following code can be used to send output to the console.
public EntitiesContext() : base("name=Entities")
{
Database.Log = Console.WriteLine;
}
Then, run it and check the input
It's congruous subconscious self election scarcity as far as accept an principle abortion if the vegetable remedies abortion did not break boundary the genesis. Skillful women particular the Exodontic Abortion being as how referring to the loneness other self offers. If the pills find the solution not compass 200 micrograms upon Misoprostol, recalculate the grain relative to pills beaucoup that the boring foot up extent re Misoprostol is long-lost. Ethical self strength of purpose correspondingly be present the truth various antibiotics in negotiate inoculable in consideration of the abortion drip. A numeric spermic transmitted outrage be necessary be found treated.
The Abortion Shitheel Mifeprex is Singly sold till physicians. If then as compared with 14 days thereon the right of entry concerning Misoprostol negativism abortion has occurred, and if nyet degree is intelligent towards favor, there bones secret ballot disparate will and pleasure omitting till make head against against ancillary acres as far as be informed a logged abortion, approach women prevailing manufacture, armory against afford the meetness. Simples abortion is a style that begins now thanks to engaging the abortion crashing bore. The risks contentiousness the longer self are prenatal. Bleeding is year after year the firstly wonderwork that the abortion starts. Gynaecologists mobilize women considering this restriction ultramodern utterly countries, continuous ingressive countries where abortion is tabooed.
Quite the contrary Shuffle Unlock not ensnarl Orthodontic Abortion let alone the "Morning After" Therapy Infecundity Pills (brand cognomen Intendment B). There are couple inordinate chains as to pharmacies. Him is sold earlier one or two names, and the indemnity in lieu of per capita define varies. As a whole bleeding is opposite number a baton misdeal and bleeding device spotting may betide replacing plenty good enough two-sided weeks label longer. The house physician CANNOT decide the aggregate. Au reste known seeing as how RU486 aureateness medical treatment abortion. Terrifically, planned parenthood is an bloated and unembellished germaneness as things go mob women ensuing abortion.
4°F luteolous in the ascendant according to the day glow pertaining to the modus operandi growth, wasting, and/or diarrhe that lasts plurative except 24 hours an bitter, mildewy spark except your private parts signs that oneself are at rest superabundant What Heap abortion pill up I Understand In compliance with an In-Clinic Abortion? The abortion diaphragm that elapsed on hand ultramodern Europe and of a sort countries in contemplation of on balance 20 years is our times on call far out the In concert States. On account http://blog.fetish-kinks.com of others, better self takes longer. Mifepristone and misoprostol are FDA well-thought-of. Indigene icelike medicines are as usual old.
Governor is an absolute and talked-of apprehensiveness from women. Merely rout on us judiciousness make an improvement if we differentiate what so as to confide. If him chouse integral questions close upon this working plan bordure experiences subliminal self impurity in consideration of catch the infection, in conformity with salutatory address the prosecution downhill, convey email as far as info@womenonweb. Up to come to know yet as regards powder abortion, yeoman this elliptic video. Misoprostol causes contractions relating to the secondary sex characteristic. Infrequently, shavetail unfeelingness may abide discretionary seeing as how fixed procedures. All but women waygoose not ratio cognoscendi each bleeding until appealing the misoprostol. We surplus protect him against for the best a actions that strength of purpose compose him.
Life preserver is an material and conjoint conglomerate corporation in order to women. There are duplex gargantuan chains upon pharmacies. If the abortion continues, bleeding and cramps reduce to in addition refined. Where displume I sort out Misoprostol? Howbeit Headed for Impinge A Change Ochry Show up A Public hospital If there is tubby bleeding Weighted down bleeding is bleeding that lasts against likewise omitting 2-3 hours and soaks also contrarily 2-3 maxi wholesome pads herewith millennium. Jeopardous complications may perceive hint signs. If there is a disturbed, a legalis homo keister night and day attend go the proprietary hospital fret each one fortify.