European ASP.NET 4.5 Hosting BLOG

BLOG about ASP.NET 4, ASP.NET 4.5 Hosting and Its Technology - Dedicated to European Windows Hosting Customer

ASP.NET Core 8 Hosting - HostForLIFE.eu :: WaitAll and WhenAll in.NET: An Overview

clock October 24, 2023 08:52 by author Peter

Asynchronous programming has become an essential aspect of modern software development, and.NET Core (now known as.NET 5,.NET 6,.NET 7, and later.NET 8) provides strong capabilities to make asynchronous processes easier. When working with tasks, you have two fundamental methods at your disposal: WaitAll and WhenAll. These methods enable you to efficiently manage and coordinate several asynchronous operations. In this blog post, we will look at WaitAll and WhenAll in.NET Core and learn about their differences and applications.

The Fundamentals of.NET Core Asynchronous Programming
Before diving into WaitAll and WhenAll, it's critical to understand the principles of.NET Core asynchronous programming. Asynchronous operations allow your application to run numerous tasks at the same time without interrupting the main thread, which improves responsiveness and speed. You deal with tasks in.NET Core, which represent units of work that can run concurrently.

public async Task DoSomeWorkAsync()
{
    // Perform asynchronous operations
    await Task.Delay(1000); // Simulate work
    // Continue with other operations
}

WaitAll - Waiting for All Tasks to Complete
Task.WaitAll is a synchronous method that blocks the current thread until all the provided tasks have completed. It ensures that all tasks finish their execution before allowing the program to proceed further. This is particularly useful when you need to perform actions only when all tasks are done.

async Task PerformMultipleOperationFromWaitllAsync()
{
    WaitAllSample waitAllSample = new WaitAllSample();
    Task task1 = waitAllSample.DoSomeWorkAsync();
    Task task2 = waitAllSample.DoSomeOtherWorkAsync();
    Task.WaitAll(task1, task2);
    Console.WriteLine("All tasks in WaitAll are complete!");

}

Using Task, on the other hand.WaitAll can cause thread blocking and may not be appropriate in all cases, particularly in UI applications where blocking the main thread can result in a frozen interface.

WhenAll - Concurrently Awaiting All Tasks


WhenAll is an asynchronous method that returns a new task that finishes when all of the specified tasks have completed. Rather of blocking the thread, it lets the computer to continue processing other activities or managing user input, which is essential for responsive apps.

async Task PerformMultipleOperationFromWhenAllAsync()
{
    WhenAllExample whenallexample = new WhenAllExample();
    Task task3 = whenallexample.DoSomethingAsync();
    Task task4 = whenallexample.DoSomethingElseAsync();
    await Task.WhenAll(task3, task4);
    Console.WriteLine("All tasks in WhenAll are complete!");
}

Task.WhenAll is better suited for cases in which numerous asynchronous operations must be performed concurrently without blocking the main thread. It is essential for developing responsive and efficient applications.

Important distinctions between WaitAll and WhenAll

Task.WaitAll is a synchronous method that causes the current thread to be blocked, whereas Task.Because WhenAll is asynchronous, additional processes can execute concurrently.
When you wish to wait for all tasks to finish before proceeding, Task.WaitAll is useful, whereas Task.WhenAll allows you to continue performing other tasks while waiting for tasks to complete.
Task.WaitAll may cause thread-blocking, rendering it inappropriate for UI applications, whereas Task.WhenAll is better suited for responsive interfaces.
Task.WaitAll is older and is frequently used in legacy programs, whereas Task.WhenAll is the ideal and modern method of managing many tasks in.NET Core.

Conclusion
Asynchronous programming is a useful technique in.NET Core for improving application responsiveness and performance. Task.Task and WaitAll.WhenAll methods are critical for managing and coordinating several asynchronous tasks. You may make informed selections when selecting the correct strategy for your specific circumstance if you understand their distinctions and use cases. .NET Core delivers the tools you need to build efficient and responsive apps, whether you need to wait for all actions to complete synchronously or proceed with other processes simultaneously.


ASP.NET Core 8 Hosting - HostForLIFE.eu :: Action Filters in ASP.NET Core

clock October 16, 2023 07:01 by author Peter

ASP.NET Core is a versatile and robust web application framework. It offers a comprehensive collection of capabilities for developing strong and scalable applications, with Action Filters being one of the essential aspects that increase its functionality. Action filters allow you to execute code before or after an action method is executed, allowing you to add cross-cutting concerns to your application. In this post, we will look at action filters in ASP.NET Core, learn about their different types, and how to develop custom filters to improve the functionality of your web application.

What exactly are Action Filters?
In ASP.NET Core, action filters are properties that can be applied to controller action methods to do pre- or post-processing. They enable you to add functionality that is executed before or after action methods are invoked. Cross-cutting concerns like as logging, authentication, caching, and others can be implemented via action filters.

There are five types of action filters in ASP.NET Core.

  • Authorization Filter
  • Resource Filter
  • Action Filter
  • Result Filter
  • Exception Filter

Filter for Authorization
An authorization filter is essential for enforcing authentication and authorisation rules in your web application. Authorization filters are commonly used to guarantee that only authenticated and authorized users have access to certain areas of your application. These filters are run before the action method, allowing you to validate the user's credentials and permissions before granting or denying access. They are an important part of implementing security and access control in ASP.NET Core applications.

Example
Assume you have a controller with an action method to which you wish to limit access based on user roles. In this scenario, we'll use an Authorization Filter to determine whether or not the user has a specified role before granting access to the action method.

First, define a custom Authorization Filter.
using Microsoft.AspNetCore.Mvc;
using Microsoft.AspNetCore.Mvc.Filters;
using Microsoft.AspNetCore.Http;
using System;

public class CustomAuthorizationFilter : Attribute, IAuthorizationFilter
{
public void OnAuthorization(AuthorizationFilterContext context)
{
    // Check if the user is in the "Admin" role
    if (!context.HttpContext.User.IsInRole("Admin"))
    {
        // If not, deny access and return a forbidden status
        context.Result = new StatusCodeResult(StatusCodes.Status403Forbidden);
    }
}
}


Next, apply the CustomAuthorizationFilter to your action method.
[CustomAuthorizationFilter] // Apply the custom authorization filter
public IActionResult AdminOnlyAction()
{
// This action is only accessible to users in the "Admin" role
return View();
}


In this example, the CustomAuthorizationFilter is applied to the AdminOnlyAction method. When a user tries to access this action, the filter checks if they are in the "Admin" role using the IsInRole method. If the user is not in the "Admin" role, the filter sets the HTTP response status code to 403 Forbidden, denying access to the action.

Resource Filter

Resource Filters in ASP.NET Core are a type of action filter that allows you to perform actions that affect the entire HTTP request and response, such as modifying response headers or handling global exceptions. These filters execute before any other filter type (Authorization, Action, Result, and Exception filters) have access to the HTTP context and can influence the entire request processing pipeline.

  • Global Exception Handling: Resource filters can be used to handle exceptions that occur during the request processing pipeline. By implementing a resource filter for exception handling, you can catch and handle exceptions globally, providing a consistent way to log errors, display custom error pages, or perform other actions.
  • Response Modification: You can modify the response object, such as adding custom response headers, changing the status code, or altering the response content, using resource filters.
  • Request Preprocessing: Resource filters can perform actions at the beginning of the request pipeline, such as setting request-specific variables or performing other pre-processing tasks.
  • Global Logging: You can use resource filters for global logging to log information about incoming requests, response times, or other metrics that apply to the entire application.

Example
Let's create a simple resource filter that adds a custom response header to every response in your ASP.NET Core application. In this example, we'll add a "X-Custom-Header" to the response.

Create a custom resource filter.
using Microsoft.AspNetCore.Mvc.Filters;

public class AddCustomHeaderResourceFilter : IResourceFilter
{
public void OnResourceExecuting(ResourceExecutingContext context)
{
    // Code to execute before the action
    context.HttpContext.Response.Headers.Add("X-Custom-Header", "MyCustomValue");
}

public void OnResourceExecuted(ResourceExecutedContext context)
{
    // Code to execute after the action
}
}


You can do this in the ConfigureServices method.
services.AddMvc(options =>
{
options.Filters.Add<AddCustomHeaderResourceFilter>();
});

Now, this resource filter will be executed for every request in your ASP.NET Core application, and it will add the "X-Custom-Header" to the response headers.

Resource filters are a powerful way to perform global actions that apply to all requests and responses in your application, making them a valuable tool for tasks like global exception handling, response modification, and request preprocessing.

Action Filter

Action Filters in ASP.NET Core are attributes that allow you to add logic that runs before and after the execution of individual action methods in your controllers. These filters are used to perform tasks such as logging, input validation, modifying the action result, and more.

Example

Let's create a simple Action Filter to log the start and end of an action method.

Create a custom Action Filter.
using Microsoft.AspNetCore.Mvc.Filters;
using Microsoft.Extensions.Logging;

public class LogActionFilter : IActionFilter
{
private readonly ILogger<LogActionFilter> _logger;

public LogActionFilter(ILogger<LogActionFilter> logger)
{
    _logger = logger;
}

public void OnActionExecuting(ActionExecutingContext context)
{
    // This method runs before the action method
    _logger.LogInformation($"Action '{context.ActionDescriptor.DisplayName}' is starting.");
}

public void OnActionExecuted(ActionExecutedContext context)
{
    // This method runs after the action method
    _logger.LogInformation($"Action '{context.ActionDescriptor.DisplayName}' has completed.");
}
}

You can do this in the ConfigureServices method.
services.AddMvc(options =>
{
options.Filters.Add<LogActionFilter>();
});

Apply the Action Filter to a controller action method.
[ServiceFilter(typeof(LogActionFilter))] // Apply the filter to this action method
public IActionResult MyAction()
{
// Your action method logic
}


Now, whenever you call the MyAction method, the LogActionFilter will log the start and end of the action, providing you with a simple way to monitor the execution of your action methods.

Result Filter

Result Filters in ASP.NET Core are a type of action filter that executes code after an action method has been executed but before the result is processed and sent to the client. These filters are useful for modifying the response or result, adding custom headers, or performing actions related to the response before it is returned to the client.

Example
Let's create a simple Result Filter to add a custom header to the response.

Create a custom Result Filter.
using Microsoft.AspNetCore.Mvc.Filters;

public class AddCustomHeaderResultFilter : IResultFilter
{
public void OnResultExecuting(ResultExecutingContext context)
{
    // This method runs before the result is executed
    context.HttpContext.Response.Headers.Add("X-Custom-Header", "MyCustomValue");
}

public void OnResultExecuted(ResultExecutedContext context)
{
    // This method runs after the result is executed
}
}

You can do this in the ConfigureServices method.
services.AddMvc(options =>
{
options.Filters.Add<AddCustomHeaderResultFilter>();
});

Apply the Result Filter to a controller action method.
[ServiceFilter(typeof(AddCustomHeaderResultFilter))] // Apply the filter to this action method
public IActionResult MyAction()
{
// Your action method logic
}


When you call the MyAction method, the AddCustomHeaderResultFilter will add the "X-Custom-Header" to the response headers before it's sent to the client. This can be useful for scenarios where you want to add custom response headers, set response content types, or perform other response-related actions.

Exception Filter

Exception Filters in ASP.NET Core are a type of action filter that are specifically designed to handle exceptions that occur during the execution of an action method. These filters allow you to define custom logic to gracefully handle and respond to exceptions, providing a way to centralize error handling and improve the user experience.

How Exception Filters Work?

Exception filters are executed when an unhandled exception is thrown during the execution of an action method. They intercept the exception before it propagates up the call stack and provide an opportunity to perform custom error handling.
Use Cases for Exception Filters

Custom Error Pages: Exception filters can redirect the user to custom error pages, displaying user-friendly error messages instead of the default error page.
Logging and Reporting: You can use exception filters to log exceptions, making it easier to identify and fix issues. You can also report exceptions to external systems for further analysis.
Graceful Degradation: In cases where an exception occurs but the application can still function to some extent, an exception filter can handle the error and return a partial or degraded response instead of a complete failure.

Example

Let's create a simple Exception Filter to log and handle exceptions.

Create a custom Exception Filter.
using Microsoft.AspNetCore.Mvc.Filters;
using Microsoft.Extensions.Logging;

public class CustomExceptionFilter : IExceptionFilter
{
private readonly ILogger<CustomExceptionFilter> _logger;

public CustomExceptionFilter(ILogger<CustomExceptionFilter> logger)
{
    _logger = logger;
}

public void OnException(ExceptionContext context)
{
    // Log the exception
    _logger.LogError($"An exception occurred: {context.Exception.Message}");

    // Handle the exception
    context.Result = new ViewResult { ViewName = "Error" };
    context.ExceptionHandled = true;
}
}


You can do this in the ConfigureServices method.
services.AddMvc(options =>
{
options.Filters.Add<CustomExceptionFilter>();
});


Apply the Exception Filter to a controller action method.
[ServiceFilter(typeof(CustomExceptionFilter))] // Apply the filter to this action method
public IActionResult MyAction()
{
// Your action method logic
}


If an unhandled exception occurs in the MyAction method, the CustomExceptionFilter will log the error and redirect the user to a custom error page.

Real-World Use Cases

Action filters are incredibly versatile and can be applied to a wide range of scenarios. Here are some real-world use cases for action filters in ASP.NET Core.

  • Logging: You can create an action filter that logs information about the execution of action methods, helping with debugging and monitoring.
  • Validation: Implement input validation checks before an action method is executed to ensure that the input data is valid.
  • Caching: Use action filters to cache the results of action methods to improve performance and reduce database or API calls.
  • Security: Implement security checks and authorization logic using action filters to restrict access to certain action methods based on user roles and permissions.
  • Exception Handling: Create custom exception filters to handle and log exceptions in a consistent and user-friendly manner.


ASP.NET Core 8 Hosting - HostForLIFE.eu :: Exploring Performance with BenchmarkDotNet in .NET

clock October 10, 2023 08:02 by author Peter

Optimization of performance is an important part of software development. As developers, we frequently attempt to write code that is efficient and speedy. However, precisely assessing code performance can be difficult. This is where BenchmarkDotNet, a powerful.NET benchmarking library, comes in. In this post, we'll look at the capabilities of BenchmarkDotNet and show you how to use it to test your.NET programs.

What exactly is BenchmarkDotNet?
BenchmarkDotNet is an open-source.NET benchmarking library. It enables developers to create, execute, and evaluate benchmarks in order to assess the performance of their programs. BenchmarkDotNet is a vital tool for optimizing.NET applications since it provides precise measurements, many run modes, and statistical analysis.

Starting Over
Before we begin benchmarking, please confirm that BenchmarkDotNet is installed in your project. You may install it with the following command in the NuGet Package Manager Console:
dotnet add package BenchmarkDotNet

Creating Your First BenchmarkLet's create a simple benchmark to compare the performance of two different implementations of a function. Consider the following example where we want to find the factorial of a number. Now you create the ConsoleApp.

Create a Class name FactorialCalculator

public class FactorialCalculator
{
    public int CalculateRecursive(int n)
    {
        if (n == 0 || n == 1)
        {
            return 1;
        }
        return n * CalculateRecursive(n - 1);
    }

    public int CalculateIterative(int n)
    {
        int result = 1;
        for (int i = 1; i <= n; i++)
        {
            result *= i;
        }
        return result;
    }
}

Let's use BenchmarkDotNet to create benchmarks for these methods and measure their performance.
using BenchmarkDotNet.Attributes;
using BenchmarkDotNet.Running;
using ConsoleApp2;

class Program
{
static void Main(string[] args)
{
    var summary = BenchmarkRunner.Run<FactorialBenchmarks>();
}
}

public class FactorialBenchmarks
{
private readonly FactorialCalculator _calculator = new FactorialCalculator();

[Benchmark]
public void RecursiveBenchmark()
{
    _calculator.CalculateRecursive(10);
}

[Benchmark]
public void IterativeBenchmark()
{
    _calculator.CalculateIterative(10);
}
}


In this example, we've created two benchmarks, RecursiveBenchmark and IterativeBenchmark, using the Benchmark attribute. The BenchmarkRunner.Run method triggers the benchmarks and generates a detailed report.
Running Benchmarks

Build in RELEASE Mode

  • Open a terminal or command prompt.
  • Navigate to the project directory using the cd command.

Run the following command to build the project in RELEASE mode:

Run Benchmarks

After building the project in RELEASE mode, you can run your benchmarks using the dotnet run command.
When building your project, it is crucial to do so in RELEASE mode in order to guarantee that the compiler applies optimizations. This will lead to more precise benchmark results. By following this suggestion, you can avoid receiving warning messages and anticipate dependable performance measurements for your benchmarks.
When you have run it then you see

It may take some time for the results to display after running the application.


It may take some time for the results to display after running the application.

  • WorkloadPilot is the code you want to measure.
  • OverheadWarmup and OverheadActual account for the time and resources consumed by BenchmarkDotNet itself.
  • WorkloadWarmup measures the time it takes for your code to stabilize during the warm-up phase.
  • WorkloadActual measures the actual performance of your code once it has reached a stable state.

Result Summary Section

The two methods we're evaluating are listed in the overview section, along with their performance metrics. The mean measure, which is the average time it takes to run each procedure, is the most essential metric.

Conclusion
BenchmarkDotNet streamlines the process of measuring performance in.NET applications. It enables developers to find bottlenecks and improve their code effectively by delivering reliable data and statistical analysis. Consider incorporating BenchmarkDotNet into your workflow as you continue to develop high-performance applications to guarantee your code runs as efficiently as possible.


ASP.NET Core 8 Hosting - HostForLIFE.eu :: Circuit Breaker in .NET Core

clock October 6, 2023 07:12 by author Peter

A circuit breaker is a software development design pattern intended to improve the resilience and fault tolerance of programs that connect with external services or resources. It takes its name from its electrical counterpart, which is intended to safeguard an electrical circuit from harm caused by high current. A circuit breaker in software performs a similar function by preventing the application from continually attempting to call a malfunctioning service or resource, which might lead to performance deterioration and other issues.

Circuit Breaker Diagram
Here's a breakdown of the circuit breaker pattern.

1. Normal Operation (Closed State)

    When the circuit breaker is closed, requests can travel through normally.
    It tracks the success and failure of these queries during this condition.
    When a particular number of failures are reached, the circuit breaker switches to the open position.

2. Unavailable State (Service)

    When the circuit breaker is open, it prevents requests from reaching the failing service or resource.
    This condition is activated when a preset number of failures is exceeded.
    No requests are sent to the service/resource while it is open, which might minimize the stress on the resource.
    The circuit breaker verifies if the service/resource has recovered on a regular basis by allowing a restricted number of test requests to get through.

3. Half-Open State (Service Availability Testing)

    After a predetermined period of time, the circuit breaker switches to the half-open position.
    In this condition, only a limited number of test requests can be sent to the service/resource to see if it has recovered.
    If these test requests are successful, the circuit breaker returns to the closed position.
    If the test requests continue to fail, the circuit breaker returns to the open position, protecting the system from additional failures.

Important Concepts

  • Circuit breakers have thresholds that determine when they switch between states. The number of successive failures, the failure rate, or a combination of factors could be used to set these criteria.
  • Timers: Timers regulate how long the circuit breaker stays in each state. For example, it may remain in the open state for a predetermined period of time before shifting to the half-open state.
  • Monitoring and request tracking are required to determine the health of the service or resource and to determine when to open or close the circuit.
  • Fallback Mechanism: While in the open state, apps can design fallback mechanisms to provide alternative functionality or smooth service degradation.
  • Automated Recovery: When the service/resource appears to have recovered, circuit breakers automatically return to the closed state, decreasing the impact on the system.

By isolating problematic services or resources, the circuit breaker design helps to prevent cascading failures in distributed systems, enhances system stability, and provides a level of fault tolerance. It is a basic idea in the development of strong and resilient software systems.

Circuit Breaker Pattern in .Net Core
Let's implement the same in .Net Core using two different approaches.

  • Approach 1 - Without using any specific Nuget package
  • Approach 2 - Using Polly Nuget package

Common steps for both approaches( will also upload the solution with this article). I am using Visual Studio for mac but you can use Visual Studio code as well.

Create a new .NET Core API Project
Add a new interface for service and the concrete service class with HttpClient as a dependency
In the concrete service, add code to make an HttpRequest to a random api and get request. I am using an open source webapi for getting random jokes
Add a controller and call the above created service in it

Joke Interface
namespace CircuitBreaker
{
    public interface IJokeService
    {
        public Task<string> GetRandomJokes();
    }
}


Joke Service
namespace CircuitBreaker
{
    public class JokeService : IJokeService
    {
        private readonly HttpClient _httpClient;

        public JokeService(HttpClient httpClient)
        {
            _httpClient = httpClient;
        }

        public async Task<string> GetRandomJokes()
        {
            try
            {
                var request = new HttpRequestMessage
                {
                    Method = HttpMethod.Get,
                    RequestUri = new Uri("https://official-joke-api.appspot.com/random_joke")
                };
                var response = await _httpClient.SendAsync(request);
                response.EnsureSuccessStatusCode();

                var responseBody = await response.Content.ReadAsStringAsync();
                return responseBody;
            }
            catch (Exception ex)
            {
                throw ex;
            }
        }
    }
}


Joke Controller
using Microsoft.AspNetCore.Mvc;

namespace CircuitBreaker.Controllers
{
    [ApiController]
    [Route("[controller]")]
    public class JokeController : ControllerBase
    {
        public readonly IJokeService _jokeService;

        public JokeController(IJokeService jokeService)
        {
            _jokeService = jokeService;
        }

        [HttpGet(Name ="GetRandomeJokes")]
        public async Task<IActionResult> Get()
        {
            try
            {
                var response = await _jokeService.GetRandomJokes();
                return Ok(response);
            }
            catch (Exception ex)
            {
                throw ex;
            }
        }
    }
}

Program.cs/StartUp.cs
public static void ConfigureService(IServiceCollection services)
{
    services.AddHttpClient<IJokeService, JokeService>();
}

Sample output

{"type":"general","setup":"What's brown and sticky?","punchline":"A stick.","id":271}

Now, the circuit breaker strategy usually allows an n number of failed tries before not-allowing any futher requests and breaking the circuite for some time. These n tries are with state, let me explain in more clarity.

Let's suppose the n count is 3 and 3 three different users tries to access the api one after the other(irrespective of the time difference between these requests) and if all three of these fails, then the 4th atempt should not even go through. The code should not further try to hit the other api untill a specifc time internal. Uptill this time interval, all requests attempts will just by-pass the api call and provide a message to end-user to try after some time. This can go in a loop if the other api issue is not resolved. This helps in making sure that the other service that we are calling is not overwhelmed with failing requests.

Let's try to implement this in Approach 1.

Create some static variables. We are creating them static as we want to persist the value of them between different calls. Please read comments for more understanding of each of it's use
//count of failed attempts that have been made
private static int attemptCount = 0;

//count of failed attempts allowed, post which the circiut will break
private static int maxAttemptCount = 3;

//flag to represent if the circuit is open or close
private static bool isCircuitOpen = false;

//field to keep a track of the utc time when the circuit was opened/broken
private static DateTime circuitOpenStartTime = DateTime.MinValue;

//the timestamp (in millisecond) for which the circuit should remain open and api call attempts should not be made
private static int circuitBreakerTimeSpanMilliseconds = 120000;


//method to start the circuit breaker
//if sets the isCircuitOpen to true and sets the time when the circuit was broken in utc
private void RecordCircuitBreakerStart()
{
    circuitOpenStartTime = DateTime.UtcNow;
    isCircuitOpen = true;
}


//method to end the circuit breaker
private void RecordCircuitBreakerEnd()
{
    circuitOpenStartTime = DateTime.MinValue;
    isCircuitOpen = false;
    attemptCount = 0;
}

//check if currently the circuit is broken or not
private void CheckIfCircuitBreakerTimeStampIsComplete()
{
    if(isCircuitOpen == true && circuitOpenStartTime.AddMilliseconds(circuitBreakerTimeSpanMilliseconds) < DateTime.UtcNow)
    {
        RecordCircuitBreakerEnd();
     }
}


Now, let's call the above method in our controller method
public async Task<string> GetRandomJokes()
{
    try
    {
        //check if the circuit was earlier open can can be closed now
        CheckIfCircuitBreakerTimeStampIsComplete();
        if (isCircuitOpen == false)
        {
            #region MakeAPICall
            var request = new HttpRequestMessage
            {
                Method = HttpMethod.Get,
                RequestUri = new Uri("https://official-joke-api.appspot.com/random_joke")
            };
            var response = await _httpClient.SendAsync(request);
            response.EnsureSuccessStatusCode();

            var responseBody = await response.Content.ReadAsStringAsync();
            return responseBody;

            #endregion
        }
        return "Service is not available. Please try after some time";
    }
    catch (Exception ex)
    {

        //in case of exception, if the max attempt of failure is not yet reached, then increase the counter
        if(isCircuitOpen == false && attemptCount < maxAttemptCount)
        {
            attemptCount++;
        }
        //if the count of max attempt if reached, then open the circuits and retuen message that the service is not available
        if(attemptCount == maxAttemptCount)
        {
            if (isCircuitOpen == false)
            {
                RecordCircuitBreakerStart();
            }
            return "Service is not reachable. Please try after some time";
        }
        return ex.Message;
    }
}


I agree with what you all must be thinking, the above approach is indeed messy and prone to more errors as we are managing multiple things at the same time. In order to make this code more readable and less error prone, we move to Approach 2

Approach 2 - In this we use an existing Nuget package, called Polly to achieve the same.

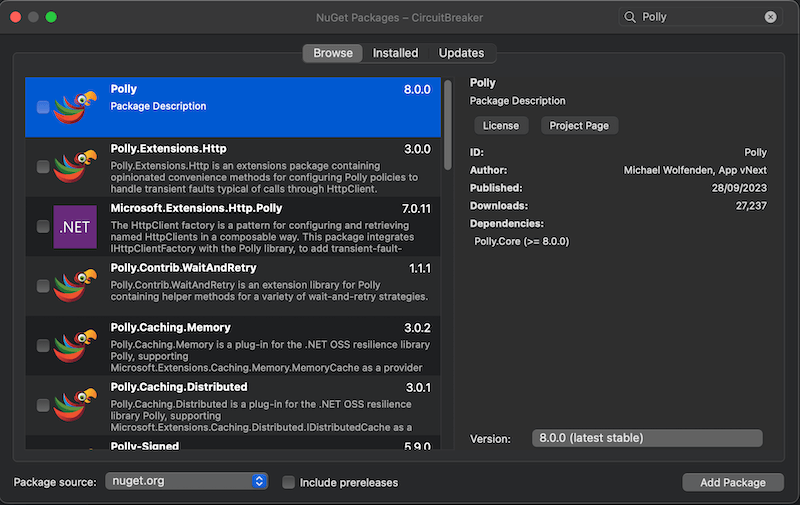
In the above code, add the nuget package Polly as in the screenshot below:

Add another nuget package - Microsoft.Extensions.Http.Polly to the solution
These packages enable us to define different policies to come into effect in case of an error. One of such policy is CircuitBreaker. Other policies to look at are RetryPolicy and WaitAndRetryPolicy.

For this, we will be adding another interface method and another service method called GetRandomJokesV2().

namespace CircuitBreaker
{
    public interface IJokeService
    {
        public Task<string> GetRandomJokes();
        public Task<string> GetRandomJokesV2();
    }
}

public async Task<string> GetRandomJokesV2()
{

    try
    {
            var request = new HttpRequestMessage
            {
                Method = HttpMethod.Get,
                RequestUri = new Uri("https://official-joke-api.appspot.com/random_joke")
            };
            var response = await _httpClient.SendAsync(request);
            response.EnsureSuccessStatusCode();

            var responseBody = await response.Content.ReadAsStringAsync();
            return responseBody;
    }

    catch (BrokenCircuitException ex)
    {

        return $"Request failed due to opened circuit: {ex.Message}";
    }
    catch (HttpRequestException httpEx)
    {
        return $"Request failed. StatusCode={httpEx.StatusCode} Message={httpEx.Message}";
    }
}

We then updated the ConfigureService method in Program.cs to add this policy. See code below:

public static void ConfigureService(IServiceCollection services)
{
    services.AddHttpClient<IJokeService, JokeService>(client =>
    {
        client.BaseAddress = new Uri("https://official-joke-api.appspot.com/random_joke");
    }).AddTransientHttpErrorPolicy(policy => policy.CircuitBreakerAsync(3, TimeSpan.FromMilliseconds(120000)));
}

In the above code, we are telling the middleware that in case this api call fails after 3 attempts, then by-pass all future api calls for 120000 miliseconds(2 mins). Post that there will be attempts to hit the api.

The way we call it in the Controller or servide does not change much
using System;
using System.Collections.Generic;
using System.Linq;
using System.Threading.Tasks;
using Microsoft.AspNetCore.Mvc;

// For more information on enabling MVC for empty projects, visit https://go.microsoft.com/fwlink/?LinkID=397860

namespace CircuitBreaker.Controllers
{
    [ApiController]
    [Route("[controller]")]
    public class JokeV2Controller : ControllerBase
    {
        public readonly IJokeService _jokeService;

        public JokeV2Controller(IJokeService jokeService)
        {
            _jokeService = jokeService;
        }

        [HttpGet(Name = "GetRandomeJokesV2")]
        public async Task<IActionResult> Get()
        {
            try
            {
                var response = await _jokeService.GetRandomJokesV2();
                return Ok(response);
            }
            catch (Exception ex)
            {
                throw ex;
            }
        }
    }
}


We can clearly see that the Approach 2 is a more advisable and enterprise approach which makes our code more readable and less prone to errors. We can also make all the policies inside another folders as classes and inject them wherever required. This will make our code more abstract.

Please let me know your thoughts on this. I am also attaching my solutions in this post.


About HostForLIFE.eu

HostForLIFE.eu is European Windows Hosting Provider which focuses on Windows Platform only. We deliver on-demand hosting solutions including Shared hosting, Reseller Hosting, Cloud Hosting, Dedicated Servers, and IT as a Service for companies of all sizes.

We have offered the latest Windows 2016 Hosting, ASP.NET Core 2.2.1 Hosting, ASP.NET MVC 6 Hosting and SQL 2017 Hosting.


Tag cloud

Sign in