European ASP.NET 4.5 Hosting BLOG

BLOG about ASP.NET 4, ASP.NET 4.5 Hosting and Its Technology - Dedicated to European Windows Hosting Customer

European ASP.NET Hosting :: How to Add Custom 404 and Error Pages in ASP.NET

clock January 23, 2019 10:26 by author Scott

I post this to remind myself how we got this working for both ASP.NET and static files, both for remote and local requests on IIS 7 and IIS 7.5.

<httpErrors> over <customErrors>

<customErrors> in web.config is a construct for specifying custom error pages for requests handled by ASP.NET. In other words, static files such as HTML files or directory (“friendly”) URLs are not handled.

<httpErrors> configures error pages in IIS itself, outside the web application. This handles all requests, whether they’re in fact handled by ASP.NET or IIS natively.

We ignore customErrors altogether and only use httpErrors.

Displaying a static HTML file

This is useful for error codes such as 500 where the ASP.NET web application in itself may suffer problems:

<httpErrors errorMode="Custom" defaultResponseMode="File">
    <clear />
    <error statusCode="500" path="Static\html\error.html"/>
</httpErrors>

Displaying an ASP.NET page

This displays an ASP.NET page when a 404 error occurs, without rewriting the URL (the visitor will still see the requested URL in the address bar):

<httpErrors errorMode="Custom" existingResponse="Replace">
  <remove statusCode="404" subStatusCode="-1" />
  <error statusCode="404" path="/Errors/404.aspx" responseMode="ExecuteURL"/>
</httpErrors>

Note that we skip the <clear /> element and simply remove the standard 404 handling (in order to avoid an exception caused by duplicate elements for the 404 status code).

Redirecting to another URL

ExecuteURL can only be used to execute an ASP.NET file within the same application. If we want to redirect to another application, or possibly an entirely different external URL, we use the Rewrite response mode with an absolute URL:

<httpErrors errorMode="Custom" existingResponse="Replace">
  <clear />
  <error statusCode="404" path="http://www.bing.com" responseMode="Redirect"/>
</httpErrors>

Make sure HTTP errors is enabled in IIS

For this to work you have to make sure the HTTP Errors feature is installed for IIS, otherwise you’ll just get an empty 404 response:


European ASP.NET Core Hosting - HostForLIFE.eu :: Customising model-binding conventions in ASP.NET Core

clock February 21, 2017 08:04 by author Scott

A pattern I use when building Web APIs is to create commands to represent an API operation and models to represent resources or results. We share these "common" objects with our .NET client so we can be sure we're using the same parameters names/types.

Here's an excerpt from Fabrik's API for creating a project:

public HttpResponseMessage Post(int siteId, AddProjectCommand command)
{
    var project = new CMS.Domain.Project(
        session.GetSiteId(siteId),
        command.Title,
        command.Slug,
        command.Summary,
        command.ContentType,
        command.Content,
        command.Template,
        command.Tags,
        command.Published,
        command.Private);

    session.Store(project);

    var model = CreateProjectModel(project);
    var link = Url.Link(RouteNames.DefaultRoute, new { controller = "projects", siteId = siteId, id = project.Id.ToIntId() });

    return Created(model, new Uri(link));
}

We also use commands for GET operations that have multiple parameters such as search endpoints. So instead of:

public IActionResult GetProjects(string searchTerm = null, int page = 1, int pageSize = 10)
{

}

We have a GetProjectsCommand:

public class GetProjectsCommand
{
    public string SearchTerm { get; set; }
    [MinValue(1, ErrorMessage = "Page must be greater than 0.")]
    public int Page { get; set; } = 1;
    public int PageSize { get; set; } = 20;
}

This provides a single place to encapsulate our default values and validation rules, keeping our controllers nice and lean.

Model-binding in ASP.NET Core MVC

To bind complex types to query strings in ASP.NET Web API we had to change the parameter binding rules. This is because the default was to bind complex types from the HTTP Request body.

When implementing the above pattern in ASP.NET Core I was pleasantly surprised to see that the following worked out of the box:

// GET: api/values
[HttpGet]
public IEnumerable<string> Get(GetValuesCommand command)
{

}

I thought that perhaps the framework detected that this was a HTTP GET request and therefore bound the parameter values from the query string instead.

Actually this is not the case - in ASP.NET Core, complex types are not bound from the request body by default. Instead you have to opt-in to body-based binding with the FromBodyAttribute:

// POST api/values
[HttpPost]
public void Post([FromBody]AddValueCommand command)
{
}

This seems an odd default given that (in my experience) binding complex types from the request body is far more common.

In any case, we can customise the default model-binding behaviour by providing a convention:

public class CommandParameterBindingConvention : IActionModelConvention
{
    public void Apply(ActionModel action)
    {
        if (action == null)
        {
            throw new ArgumentNullException(nameof(action));
        }

        foreach (var parameter in action.Parameters)
        {
            if (typeof(ICommand).IsAssignableFrom((parameter.ParameterInfo.ParameterType)))
            {
                parameter.BindingInfo = parameter.BindingInfo ?? new BindingInfo();
                parameter.BindingInfo.BindingSource = BindingSource.Body;
            }
        }
    }
}

Which is registered like so:

public void ConfigureServices(IServiceCollection services)
{
    services.AddMvc(options =>
    {
        options.Conventions.Add(new CommandParameterBindingConvention());
    });
}

This convention checks to see if the parameter type implements ICommand (a marker interface I created) and if so, instructs the framework to bind the values for this parameter from the request body.

All I have to do then is update my command with this interface:

public class AddValueCommand : ICommand
{
    public string Value { get; set; }
}

Then I can drop the unnecessary [FromBody] attribute:

// POST api/values
[HttpPost]
public void Post(AddValueCommand command)
{
}


European ASP.NET Core Hosting - HostForLIFE.eu :: Cookie Authentication and Policy Based Authorization in ASP.NET Core

clock February 6, 2017 10:23 by author Scott

This is the first part of the series of articles I'll be covering about ASP.NET Core Security. We're going to start off with cookie based authentication and build our way up to configuring policy based authorization.

As part of the ASP.NET Core security, there is a new richer policy based authorization that we can use to authorize against the claims in user's possession.

Let's build an example MVC application to demonstrate the concepts. In our scenario, we'll demand users to be authenticated and have Read claim to view the home page of our application.

I am using Visual Studio 2015 Pro Edition w/Update 3 (you should also be able to use the free community edition).

1. Create a new ASP.NET Core Web Application


2. Select the Empty Template


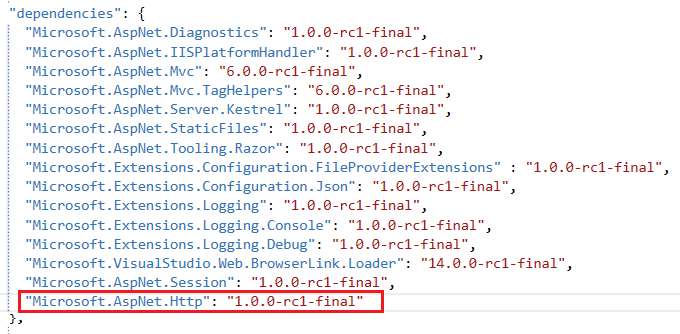
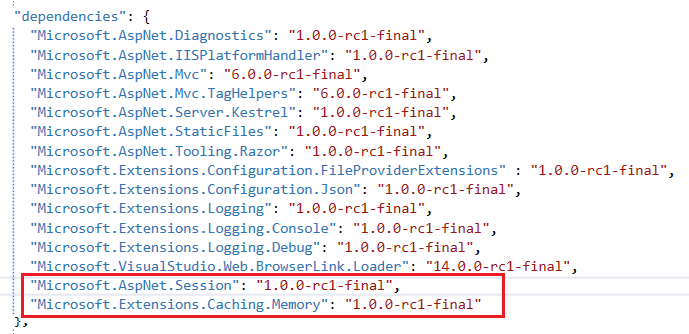
3. We need to add the required nuget packages to configure authorization, cookie authentication, and the mvc middleware. Bring up the project.jsonfile, add the following under the dependencies section.

"Microsoft.AspNetCore.Authorization": "1.0.0"
"Microsoft.AspNetCore.Authentication.Cookies": "1.0.0"
"Microsoft.AspNetCore.Mvc": "1.0.0"


4. Once you save the project.json file, Notice Visual Studio installs the missing nuget packages automatically. Next, bring up the Startup.cs where we'll configure the middleware we just included in our project.

5. In Configure method, add the following authentication middleware configuration;

app.UseCookieAuthentication(new CookieAuthenticationOptions
    {
        AuthenticationScheme = "Cookies",
        LoginPath = new StringPath("/Account/Login"),
        AccessDeniedPath = new StringPath("/Home/Forbidden"),
        AutomaticAuthenticate = true,
        AutomaticChallenge = true
    });

Here we're using the Cookie authentication, defining our LoginPath, where users will be redirected for authentication, and AccessDeniedPath when the user is not authorized. AutomaticAuthenticate flag indicates that the middleware should run on every request and attempt to validate and reconstruct any serialized principal it created. AutomaticChallenge flag indicates that the middleware should redirect the browser to the LoginPath or the AccessDeniedPath when the authorization fails (there are various other configuration options, however this the bare minimum we need for this example).

Next, we'll configure the requirements for the ReadPolicy. The policy will demand the user to be authenticated and have the Read claim in order access the required resource(s). Depending on your authorization logic, you can setup your policy to require additional claims.

public void ConfigureServices(IServiceCollection services) 
{
    services.AddAuthorization(options =>
    {
        options.AddPolicy("ReadPolicy", policyBuilder =>
        {
            policyBuilder.RequireAuthenticatedUser()
                .RequireAssertion(context => context.User.HasClaim("Read", "true"))
                .Build();
        });
    });
}

6. Finally we need to add the mvc middleware configuration.

app.UseMvc(builder =>
    {
        builder.MapRoute("default", "{controller=Home}/{action=index}/{id?}");
    });

Let's add couple of controllers so that we can test the login and the policy we've created. Create AccountController for user login and HomeController where we'll apply the ReadPolicy.

7. In the AccountController.cs add the following actions to login user;

[HttpGet]
public IActionResult Login(string returnUrl) 
{
    ViewData["ReturnUrl"] = returnUrl;
    return View();
}

8. Add a simple Login.cshtml view under the Views/Account folder (create the folder structure if it doesn't exists) where the user can login to the application.

<form asp-action="Account/Login" method="post" 
      asp-route-returnUrl="@ViewData["ReturnUrl"]">
    <div>
        <label>Username</label>
        <input type="text" name="username" />
    </div>
    <div>
        <label>Password</label>
        <input type="password" name="password" />
    </div>
    <div><button>Login</button></div>
</form> 

In the POST login action, we have a simple verification; The username and the password must match in order to authenticate the user (Obviously you wouldn't do this in a real production application but for our demo purposes this is fine). If they match, we then create a set of claims, the claims identity, and the claims principle that represents the authenticated user. Then, we sign in the user (means we issue a cookie to the user which contains the set of claims we've created) and redirect back to the resource that was requested for access.

[HttpPost]
public async Task<IActionResult> Login(string username, string password, string returnUrl) 
{
    if (username == password)
    {
        var claims = new List<Claim>
        {
            new Claim("Read", "true"),
            new Claim(ClaimTypes.Name, "ayayalar"),
            new Claim(ClaimTypes.Sid, "12345")
        };

        var claimsIdentity = new ClaimsIdentity(claims, "password");
        var claimsPrinciple = new ClaimsPrincipal(claimsIdentity);

        await HttpContext.Authentication.SignInAsync("Cookies", claimsPrinciple);

        if (Url.IsLocalUrl(returnUrl))
        {
            return Redirect(returnUrl);
        }

        return Redirect("~/");
    }

    return View();
}

9. Add the following action to the HomeController.cs;

[Authorize(Policy = "ReadPolicy")]
public IActionResult Index() 
{
    return View();
}

Note that we passed the ReadPolicy to the authorization attribute. The user must be authenticated and have a Read claim to have access. Otherwise, they'll be forwarded to the Forbidden page as we specified in the authentication middleware configuration.

The Index.cshtml view for the home page (can be as simple as one line of code) under Views/Home folder;

<h1>Access Granted</h1>

We should be able to test our changes at this point. Once you run the application, you'll be redirected to the login page since you're not authenticated (notice the return url in the query string is set automatically by the framework). Upon successfully submitting your credentials, you will be authorized and redirected to the home page.

For testing purposes, try removing the Read claim we've added in the Loginaction, rebuild your solution and restart the application, even if the user can login successfully, authorization will be denied and the user will be redirected to the Forbidden page.


European ASP.NET 4.5 Hosting - UK :: How to Improve Your Entity Framework Performance

clock November 23, 2015 23:46 by author Scott

LINQ to Entity is a great ORM for querying and managing databases. There are some points that we should consider while designing and querying databases using the Entity Framework ORM.

Disable change tracking for entity if not needed

In the Entity Framework, the context is responsible for tracking changes in entity objects. Whenever we are only reading data, there is no need to track the entity object. We can disable entity tracking using the MergeOption, as in:

AdventureWorksEntities e = new AdventureWorksEntities();
e.EmployeeMasters.MergeOption = System.Data.Objects.MergeOption.NoTracking;

Use Pre-Generating Views to reduce response time for the first request

While working with Entity Framework, view generation may take longer for a large and complicated model. We can use a pre-generated view to save run time cost to generate a view for the first request of a page. A Model Generated view helps us to improve start-up performance at run time.

Avoid fetching all the fields if not required

Avoid fetching all fields from the database that are not really required. For example we have an EmployeeMaster table and for some operation I require only the EmployeeCode field so the query must be:

AdventureWorksEntities e = new AdventureWorksEntities();
string
 code = e.EmployeeMasters.Where(g => g.EmployeeId == 1000)
                                                             .Select(s => s.EmployeeCode).FirstOrDefault();

Retrieve only required number of records (rows)

Do not collect all data while binding data to a data grid. For example if we have a data grid on a page and we only show 10 records on the screen, so do not fetch all records from the database, as in:

AdventureWorksEntities e = new AdventureWorksEntities();
int
 pageSize = 30, startingPageIndex = 3;
List<EmployeeMaster> lstemp = e.EmployeeMasters
                                                           .Take(pageSize)
                                                           .Skip(startingPageIndex * pageSize).ToList();

Avoid using Contains

Avoid use of the contain keyword with a LINQ - Entity Query. While Entity Framework generates equivalent SQL, the contain is converted in the "WHERE IN" clause. The "IN" clause has performance issues.

Avoid using Views

Views degrade the LINQ query performance. So avoid using views in LINQ to Entities.

Use Compiled Query

If you are using Entity Framework 4.1 and below, you must use a compiled query. The Compiled Query class provides compilation and caching of queries for reuse. The Entity Framework 5.0 supports a new feature called Auto-Compiled LINQ Queries. With EF 5.0, LINQ to Entity queries are compiled automatically and placed in EF's query cache, when executed.

static Func<AdventureWorksEntitiesIQueryable<EmployeeDetail>> getEmpList = (
            CompiledQuery.Compile((AdventureWorksEntities db) =>
                db.EmployeeDetails
            ));

AdventureWorksEntities e = new AdventureWorksEntities1();
List
<EmployeeDetail> empList = getEmpList(e).ToList();

Must examine Queries before being sent to the Database

When we are investigating performance issues, sometimes it's helpful to know the exact SQL command text that the Entity Framework is sending to the database. I would suggest that we must examine each and every LINQ to Entity queries to avoiding performance issues.

Efficiently Loading Related Data

Entity Framework supports the loading of related data. The Include method helps us load relevant data. Use of the Include method ensures it is really required for the page i.e. do not include a navigation property whenever it is not really required.

Select appropriate Loading type while defining model

Entity Framework supports three ways to load related data: eager loading, lazy loading and explicit loading. Eager loading is the process in which a query of one type of entity also loads related entities as part of the query. Eager loading is done by use of the Include method. Lazy loading is the process in which an entity or collection of entities is automatically loaded from the database the first time that a property referring to the entity/entities is accessed. When lazy loading disabled, it is possible to lazily load related entities with use of the Load method on the related entity's entry. It is called explicit loading. So depending upon on the type of application and requirement we can select appropriate Loading type for the entity model.

Conclusion

Using the above definition tips, we can definitely improve the performance of LINQ to Entity Queries.


European ASP.NET Hosting - France :: How to Improve your ASP.NET Web API Performance

clock February 24, 2015 08:46 by author Scott

In this article, I will share about how to improve your ASP.NET Web API performance

1. Use fastest JSON serializer

JSON serialization  can affect overall performance of ASP.NET Web API significantly. A year and a half I have switched from JSON.NET serializer on one of my project to ServiceStack.Text .

2. Use other formats if possible (protocol buffer, message pack)

If you can use other formats like Protocol Buffers or MessagePack in your project instead of JSON do it.

You will get huge performance benefits not only because Protocol Buffers serializer is faster, but because format is smaller than JSON which will result in smaller and faster responses.

3. Implement compression

Use GZIP or Deflate compression on your ASP.NET Web API.

Compression is an easy and effective way to reduce the size of packages and increase the speed.

4. Use Caching

If it makes sense, use output caching on your Web API methods. For example, if a lot of users accessing same response that will change maybe once a day.

5. Implement async on methods of Web API

Using asynchronous Web API services can increase the number of concurrent HTTP requests Web API can handle.

Implementation is simple. The operation is simply marked with the async keyword and the return type is changed to Task.

[HttpGet] 
public async Task OperationAsync() 
{  
    await Task.Delay(2000); 
}

6. Use classic ADO.NET if possible

Hand coded ADO.NET is still the fastest way to get data from database. If the performance of Web API is really important for you, don’t use ORMs.

Please just see this table performance below

The Dapper and the hand-written fetch code are very fast, as expected, all ORMs are slower than those three.

LLBLGen with resultset caching is very fast, but it fetches the resultset once and then re-materializes the objects from memory.

Hope above tutorial help you.


European ASP.NET 4.5 Hosting - Spain :: How to Optimize Your ASP Pages

clock August 14, 2014 13:09 by author Onit

This Article will tell you how to faster loading of your ASP Pages and make the performance better, If you read the internet and all of the websites dedicated to Asp.Net you will inevitably read about the wonders of the DataGrid, DataList, and Repeater controls. While each of these has its place, if you are only displaying data there is a much faster and more efficient means to do so. Let's say you have a page that displays articles based on a query string. A normal asp page execution procedure goes like this. The code queries the database based on the Article I.D. and then brings back that information to the page where you display it in the fashion that you would like. This is a fairly straight forward approach with asp and is done all the time.


Check The Easy Step Below!

Use Asp.Net Caching

This is a no-brainer, and I won't go into the brilliance or details of asp.net caching here because at the time of this writing Google has 2,780,000 articles on the topic. Basically instead of querying the database each time the page is loaded you only query the database once and load that result into the system cache. Subsequent calls to load the page retrieve the data from the cache as opposed to the database which gives you an instant and considerable performance boost. You can then set the cache for how long the cache should store the information as well as many other features. If you are not using the cache, you should be whenever possible!

If possible, do NOT use the standard Asp.Net controls.

That's right. The standard asp.net controls are designed for rapid development and not page performance. They allow you to design pages that grab and display data very quickly but their actual performance suffers because of the extra overhead which is there for ease and speed of development time and not page execution speed.

Instead, create either a User Control or even better yet a Web Custom Control which is by far the fastest performance wise and really quite easy to create and use.

Use an SqlDataReader or even better yet use a set based command for Sql Server data retrieval and simply execute that one command against the database.

An asp.net SqlDataReader is a fast forward only datareader that closes the connection after it reads the last set of results. Now for my article pages we are only returning 1 particular result. In this case we would opt for the set based command. If you had more than 1 result returned, in your table of contents for instance, you would use the SqlDataReader because you are returning multiple sets of results.

Set based commands are stored procedures that bring back data through parameters as opposed to a result set which then in turn needs to be looped through to obtain your data. So instead of writing your stored procedure like the following which brings back 1 result set:

Select Title, Body, Author
From Articles
Where ArtID = 215

We can write it using a set based command like this.

Create Procedure mysp_GetArticle

@Title varchar(200) Output,
@Body varchar(8000) Output,
@Author varchar(500) Output


As

Select @Title = Title, @Body = Body, @Author = Author
From Articles
Where ArtID = 215

GO
The above query will return only the three parameters called for and not a result or record set so you
don't have to then walk through the returned record set that has only 1 result in it anyway. This second
little process of work decreases your performance so you should avoid it whenever possible. Combine
this technique with the asp.net cache

Use Classes and ArrayLists as opposed to returning an SqlDataReader.

Create a class and then if there are more than one set of results store those results into individual instantiations of that class. Finally store each of those classes into an ArrayList. You can then store only that ArrayList into the asp.net cache. So instead of getting the results back from a SqlDataReader when loading your page you get them from the ArrayList which is stored in the cache.

On the first time the page loads, query the database and return all of your data storing it into individual classes. Then store each of those classes into an ArrayList. If you only have one single result you may store only the class into the cache. Then take your ArrayList and store it into the cache.

Next create a Web Custom Control and pass the cached ArrayList to the custom control and loop out your data using the HtmlTextWriter which is very fast. Remember each subsequent call to load the page will be called from the cache which stores your ArraList of classes or your single class.

Certainly it takes a significant amount of additional coding to do it in this fashion, especially when you take proper error handling into consideration, but if you follow this approach your pages will be screeching fast, you will immediately notice the difference, and your asp.net pages will execute in the proper sequence - Data handling in the Page_Load function and the html display in the Page_Render function.


European ASP.NET 4.5 Hosting - HostForLIFE.eu :: Send Bulk Email Using ASP.NET 4.5

clock January 22, 2014 05:58 by author Scott

This article explains how to send bulk email using ASP.Net 4.5. You can use:

  • ASP .NET web page
  • Grid View
  • HTML Email Templates
  • Gmail SMTP Mail Server

Create a new project using "File" -> "New" -> "Project..." then select web "ASP .Net Web Forms Application". Name it " Bulk Email".

Now in the Design page “Default.aspx” design the web page as in the following screen:

In the Design Source (Default.aspx) write the code as: 

Default.aspx.cs

<%@ Page Title="Home Page" Language="C#" MasterPageFile="~/Site.Master" AutoEventWireup="true"
CodeBehind="Default.aspx.cs"
 Inherits="BulkEmail._Default" %>

<asp:Content runat="server" ID="FeaturedContent" ContentPlaceHolderID="FeaturedContent">
   
 <section class="featured">
       
 <div class="content-wrapper">
           
 <hgroup class="title">              
               
 <h2>Send Bulk email using asp.net</h2>
           
 </hgroup>
           
 <p>
                To learn more about ASP.NET
           
 </p>
       
 </div>
   
 </section>
</asp:Content>
<asp:Content
 runat="server" ID="BodyContent" ContentPlaceHolderID="MainContent">
      
 <h3>We suggest the following:</h3>
   
 <asp:Panel ID="Panel1" runat="server" Width="100%" ScrollBars="Horizontal">
   
 <p>
      
 <asp:Button ID="btnBind" runat="server" Text="View" OnClick="btnBind_Click" /> <asp:Label
ID="Label1"
 runat="server" Font-Bold="true" ForeColor="Green" Text="Total Customers:">   
</asp:Label><asp:Label ID="lbltotalcount" runat="server" ForeColor="Red" Font
Size
="Larger"></asp:Label> </p>


 <asp:Button ID="btnSend" runat="server" Text="Send" OnClick="btnSend_Click" />
       
 <asp:GridView ID="grvCustomers" runat="server"></asp:GridView>

   
 </asp:Panel>
</asp:Content>

In the Web.config file create the connection string as:

Web.config

<connectionStrings>     
   
<add
 name="ConnectionString"connectionString="Server=localhost;userid=root;password=;Database=
orthwind"providerName="MySql.Data.MySqlClient"/>      

</connectionStrings>

In the code behind file (Default.aspx.cs) write the code as: 

using
 System;
using System.Collections.Generic;
using System.Linq;
using System.Web;
using System.Web.UI;
using System.Web.UI.WebControls;

//Using namespaces 
using MySql.Data.MySqlClient;
using System.Configuration;
using System.Text;
using System.Net;
using System.Net.Mail;
using System.Data;

namespace BulkEmail
{
   
 
public partial class _Default : Page
    {
        #region MySqlConnection Connection
       
 
MySqlConnection conn = new
MySqlConnection(ConfigurationManager.ConnectionStrings["ConnectionString"].ConnectionString);

       
 protected void Page_Load(object sender, EventArgs e)
        {
           
 
Try
            {
               
 if (!Page.IsPostBack)
                {

                }
            }
           
 
catch (Exception ex)
            {
                ShowMessage(ex.Message);
            }
        }
        #endregion
        #region show message
       
 
/// <summary>
       
 /// This function is used for show message.
       
 /// </summary>
       
 /// <param name="msg"></param>
       
 void ShowMessage(string msg)
        {
           
 ClientScript.RegisterStartupScript(Page.GetType(), 
"validation", "<script
language='javascript'>alert('"
 + msg + "');</script>");
        }      
 
        #endregion
        #region Bind Data
       
 
/// <summary>
       
 /// This display the data fetched from the table using MySQLCommand,DataSet and
MySqlDataAdapter

       
 /// </summary>
       
 /// <param name="sender"></param>
       
 /// <param name="e"></param>
       
 protected void btnBind_Click(object sender, EventArgs e)
        {
           
 
Try
            {
                conn.Open();
               
 MySqlCommand cmd = new MySqlCommand("Select
CustomerID,ContactName,Address,Phone,Email from customers"
, conn);
               
 MySqlDataAdapter adp = new MySqlDataAdapter(cmd);
               
 DataSet ds = new DataSet();
                adp.Fill(ds);
                grvCustomers.DataSource = ds;
                grvCustomers.DataBind();
                lbltotalcount.Text = grvCustomers.Rows.Count.ToString();
            }
           
 catch (MySqlException ex)
            {
                ShowMessage(ex.Message);
            }
           
 
Finally
            {
                conn.Close();

            }
            btnBind.Visible =
 false;
        }
        #endregion
        #region Bulk email,GridView,gmail
       
 
/// <summary>
       
 /// this code used to Send Bulk email 
       
 /// </summary>
       
 /// <param name="sender"></param>
        
/// <param name="e"></param>
       
 protected void btnSend_Click(object sender, EventArgs e)
        {
           
 
Try
            {
                lbltotalcount.Text =
 string.Empty;
               
 foreach (GridViewRow grow in grvCustomers.Rows)
               {
                   
 
string strCustomerID = grow.Cells[0].Text.Trim();
                   
 
string strContactName = grow.Cells[1].Text.Trim();
                   
 
string strAddress = grow.Cells[2].Text.Trim();
                   
 
string strPhone = grow.Cells[3].Text.Trim();
                   
 
string strEmail = grow.Cells[4].Text.Trim();                


string filename = Server.MapPath("~/Event.html");
                   
 string mailbody = System.IO.File.ReadAllText(filename);
                    mailbody = mailbody.Replace(
"##NAME##", strContactName);
                   
 string to = strEmail;
                   
 
string from = "[email protected]";
                   
 MailMessage message = new MailMessage(from, to);
                    message.Subject =
 "Auto Response Email";
                    message.Body = mailbody;
                    message.BodyEncoding =
 Encoding.UTF8;
                    message.IsBodyHtml =
 true;
                   
 SmtpClient client = new SmtpClient("smtp.gmail.com", 587);
                    System.Net.
NetworkCredential basicCredential = new
System.Net.
NetworkCredential("[email protected]", "Password");
                    client.EnableSsl =
 true;
                   
 client.UseDefaultCredentials = true;
                    client.Credentials = basicCredential;
                   
 try
                    {
                        client.Send(message);
                        ShowMessage(
"Email Sending successfully...!" + strContactName + " &nbsp;");                                           
                    }
                   
 catch (Exception ex)
                    {
                        ShowMessage(ex.Message);
                    }
                } 
            }
           
 
catch (MySqlException ex)
            {
                ShowMessage(ex.Message);
            }
           
 
Finally
            {
                conn.Close();
            }
        }
        #endregion
    }
}

See the following screen for the Default.aspx: Total Customers data bind.

Now, see the following screen for the Default.aspx: send email waiting.

Now, show in the Message box “Email sending successfully”.

Now "Email Account Open" - > "View Email". You’ll see the messages on your inbox. Bulk Sending an E-Mail Using ASP.NET 4.5 with HTML Email Templates and Gmail SMTP Mail Server. I hope this article is useful. 


European ASP.NET Hosting - Nederland :: How to Solve System.Net.Mail: The specified string is not in the form required for a subject

clock January 21, 2014 08:59 by author Scott

Sometimes you’ll see this error on your site and it is really annoying. I post this issue as I see many people on forums experiencing on this issue. This is an error message:

“ArgumentException: The specified string is not in the form required for a subject“.

So what is exactly “the form required for a subject”? Googling for this error message returns a lot of junk and misinformed forum posts. It turns out that setting the Subject on a System.Net.Mail.Message internally calls MailBnfHelper.HasCROrLF (thank you Reflector) which does exactly what it says on the tin. Therefore one forum poster’s solution of subject.Replace("\r\n", " ") isn’t going to work when you have either a carriage returnor line feed in there.

The solution is like this:

message.Subject = subject.Replace('\r', ' ').Replace('\n', ' ');

Personally, I think that the MailMessage should to this for you or at least Microsoft should document what actually constitutes a “form required for a subject” in MSDN or, even better, in the actual error message itself!


European ASP.NET Hosting - Amsterdam :: Tips to Populate Or Bind DropDownList With JQuery And XML In Asp.Net

clock July 8, 2013 11:32 by author Scott

In this example i'm explaining How To Populate Or Bind DropDownList With JQuery And XML In Asp.Net.

Add jquery library reference in head section and place one dropdown on the page.

Add one list item with select as it's value.

   1:  <asp:DropDownList ID="DropDownList1" runat="server">
   2:  <asp:ListItem>Select</asp:ListItem>
   3:  </asp:DropDownList>
   4:   
   5:  <asp:Label ID="Label1" runat="server" Text=""/>


Following is the Cities.xml file i'm using to bind dropdownlist using jquery.

01<!--?xml version="1.0" encoding="utf-8" ?-->
02<cities>
03  <city>
04    <name>New York</name>
05    <id>1</id>
06  </city>
07    <city>
08    <name>Washington</name>
09      <id>2</id>
10  </city>
11  <city>
12    <name>Chicago</name>
13    <id>3</id>
14  </city>
15  <city>
16    <name>Seattle</name>
17    <id>4</id>
18  </city>
19</cities>

Add this script in head section of page.

01<script src="jquery-1.7.2.min.js" type="text/javascript"></script>  
02<script type="text/javascript">
03$(document).ready(function()
04{
05  $.ajax(
06  {
07    type: "GET",
08    url: "Cities.xml",
09    dataType: "xml",
10    success: function(xml)
11    {
12      var dropDown = $('#<%=DropDownList1.ClientID %>');
13      $(xml).find('City').each(function()
14      {
15        var name = $(this).find('name').text();
16        var id = $(this).find('id').text();
17        dropDown.append($("<option></option>").val(id).html(name));
18      });
19      dropDown.children(":first").text("--Select--").attr("selected", true);
20    }
21  });
22  $('#<%=DropDownList1.ClientID %>').change(function()
23  {
24  var ddl = $('#<%=DropDownList1.ClientID %>');
25  var selectedText = $('#<%=DropDownList1.ClientID %> option:selected').text();
26  var selectedValue = $('#<%=DropDownList1.ClientID %>').val();
27  document.getElementById('Label1').innerHTML = "You selected " + selectedText + " With id " + selectedValue;
28  });
29});
30</script>

Build and run the code.


European ASP.NET 4.5 Hosting - Amsterdam :: Change Session Timeout in ASP.NET

clock July 1, 2013 11:53 by author Scott

You’re trying to increase session timeout on your ASP.NET site? In this tutorial, I will gonna talk about this issue. But, if you use shared hosting, you cant use session as it will impact to other clients site.

ASP.NET

Usually, the first and easiest thing to do is just change the configuration/system.web/sessionState@timeout value to something like “90″.  This should mean that you’d like your users’ sessions to be persisted until a 90 minute window of idle time has elapsed.

<configuration>
  <system.web>
  ...
   <sessionState timeout="90" />
  ...
 </system.web>
</configuration>

Hmm… Not only about change on your code, but please check this application pool timeout on your IIS setting.

Ensure this value is set to the timeout of your session, at a minimum, to ensure that all sessions persist for the entire session timeout period.

The reason that these two values are dependent on one another is because the session information is actually stored within the worker process of the application pool. That is to say, if the worker process is shutdown or killed for any reason, the session information will be lost.

Session Storage Mode

There are the modes of storing the session information:

  • InProc (or In Process) – Default – Stores session information within the IIS worker process
  • StateServer – Stores session information in a separate process (the ASP.NET state service)
  • SQLServer – Stores session information in a SQL database

The only mode that is vulnerable to losing session information on a worker process is when the state is stored in the worker process. Both StateServer and SQLServer modes are not affected by worker process resets. Likewise, StateServer and SQLServer modes are the only options when it is necessary to share session state across more than a single IIS server.

For more information about these modes, check out MSDN.

ASP

There’s two ways to change the session timeout when you’re dealing with classic ASP.

You can set it at the application level, or programmatically, which means that the value can be different within the application.

Since it doesn’t specifically state that the setting is for classic ASP, it may be confusing to know that the value is in: Application Properties -> Configuration… -> Options -> Enable session state.

It’s as simple as updating this value, and the session timeout for your entire classic ASP application is changed!

Programmatically

You can also use modify the Session.Timeout property at runtime to affect the timeout period of the session. One popular location to put this piece of code is in the global.asa file.

<script language="VBScript" runat="Server">
Sub Session_OnStart
 Session.Timeout = 90
End Sub
</SCRIPT>

Hope this tutorial helpful. 


About HostForLIFE.eu

HostForLIFE.eu is European Windows Hosting Provider which focuses on Windows Platform only. We deliver on-demand hosting solutions including Shared hosting, Reseller Hosting, Cloud Hosting, Dedicated Servers, and IT as a Service for companies of all sizes.

We have offered the latest Windows 2016 Hosting, ASP.NET Core 2.2.1 Hosting, ASP.NET MVC 6 Hosting and SQL 2017 Hosting.


Tag cloud

Sign in