European ASP.NET 4.5 Hosting BLOG

BLOG about ASP.NET 4, ASP.NET 4.5 Hosting and Its Technology - Dedicated to European Windows Hosting Customer

ASP.NET Core 1.1 Hosting - HostForLIFE.eu :: How to Create Login Form In ASP.NET?

clock March 9, 2017 07:58 by author Peter

In this tutorial, I will show you how to create login form in ASP.NET core. You can easily implement this concept anywhere in .NET applications. I have used some controls to build the login form in a .NET application.

  •  Text Box
  •  Label and Button

Please follow these steps to make this application.
Step 1
First, open your Visual Studio -> File -> New -> Website -> ASP.NET Empty website and click OK. Now, open Solution Explorer and go to Add New Item -> Web form -> click Add.

Step 2
Now, make a Login page like the one given below.
.aspx or design page (front-end)
    <html xmlns="http://www.w3.org/1999/xhtml">  
      
    <head runat="server">  
        <title>Login Form</title>  
    </head>  
      
    <body>  
        <form id="form1" runat="server">  
            <div>  
                <table>  
                    <tr>  
                        <td> Username: </td>  
                        <td>  
                            <asp:TextBox ID="txtUserName" runat="server" />  
                            <asp:RequiredFieldValidator ID="rfvUser" ErrorMessage="Please enter Username" ControlToValidate="txtUserName" runat="server" /> </td>  
                    </tr>  
                    <tr>  
                        <td> Password: </td>  
                        <td>  
                            <asp:TextBox ID="txtPWD" runat="server" TextMode="Password" />  
                            <asp:RequiredFieldValidator ID="rfvPWD" runat="server" ControlToValidate="txtPWD" ErrorMessage="Please enter Password" /> </td>  
                    </tr>  
                    <tr>  
                        <td> </td>  
                        <td>  
                            <asp:Button ID="btnSubmit" runat="server" Text="Submit" /> </td>  
                    </tr>  
                </table>  
            </div>  
        </form>  
    </body>  
      
    </html>  


Now, create an event for click button, such as -  onclick="<>".
    onclick="btnSubmit_Click"  

So, our button tag will be like <asp:Button ID="btnSubmit" runat="server" Text="Submit" onclick="btnSubmit_Click" />. And in login.aspx.cs page, we need to write the following code.

C# Code --Code behind(Aspx.cs)
    using System;  
    using System.Data;  
    using System.Data.SqlClient;  
    using System.Configuration;  


After adding the namespaces, write the following code in code behind.
    protected void btnSubmit_Click(object sender, EventArgs e) {  
        SqlConnection con = newSqlConnection(ConfigurationManager.ConnectionStrings["dbconnection"].ConnectionString);  
        con.Open();  
        SqlCommand cmd = new SqlCommand("select * from UserInformation where UserName =@username and Password=@password", con);  
        cmd.Parameters.AddWithValue("@username", txtUserName.Text);  
        cmd.Parameters.AddWithValue("@password", txtPWD.Text);  
        SqlDataAdapter da = new SqlDataAdapter(cmd);  
        DataTable dt = new DataTable();  
        da.Fill(dt);  
        if (dt.Rows.Count > 0) {  
            Response.Redirect("Details.aspx");  
        } else {  
            ClientScript.RegisterStartupScript(Page.GetType(), "validation", "<script language='javascript'>alert('Invalid Username and Password')</script>");  
        }  
    }  


Now, for connecting it with the database, write the database connection string like the following.

Web Config
    <connectionStrings>  
        <add name="dbconnection" connectionString="Data Source=BrajeshKr;Integrated Security=true;Initial Catalog=MyDB" /> </connectionStrings>

That's it. Now, our Login page is ready to be executed. You can download the code for this application and run that on your Visual Studio.

HostForLIFE.eu ASP.NET Core 1.1 Hosting

European best, cheap and reliable ASP.NET hosting with instant activation. HostForLIFE.eu is #1 Recommended Windows and ASP.NET hosting in European Continent. With 99.99% Uptime Guaranteed of Relibility, Stability and Performace. HostForLIFE.eu security team is constantly monitoring the entire network for unusual behaviour. We deliver hosting solution including Shared hosting, Cloud hosting, Reseller hosting, Dedicated Servers, and IT as Service for companies of all size.


European ASP.NET Core Hosting - HostForLIFE.eu :: File logging on ASP.NET Core

clock March 8, 2017 10:13 by author Scott

ASP.NET Core introduces new framework level logging system. Although it is feature-rich it is not complex to use and it provides decent abstractions that fit well with the architecture of most web applications. This blog post shows how to set up and use Serilog file logging using framework-level dependency injection.

Configuring logging

Logging is configured in ConfigureServices() method of Startup class. ASP.NET Core comes with console and debug loggers. For other logging targets like file system, log servers etc third-party loggers must be used. This blog post uses Serilog file logger.

"dependencies": {
 
// ...
  "Serilog.Extensions.Logging.File": "1.0.0"
},

Project has now reference to Serilog file logger. Let’s introduce it to ASP.NET Core logging system. AddFile(string path) is the extension method that adds Serilog file logger to logger factory loggers collection. Notice that there can be multiple loggers active at same time.

public void Configure(IApplicationBuilder app, IHostingEnvironment env, ILoggerFactory loggerFactory)
{
    loggerFactory.AddConsole(Configuration.GetSection("Logging"));
    loggerFactory.AddDebug();
    loggerFactory.AddFile("Logs/ts-{Date}.txt");
 
    // ...
}

Serilog will write log files to Logs folder of web application. File names are like ts-20170108.txt.

Injecting logger factory

Loggers are not injected to other classes. It’s possible to inject logger factory and let it create new logger. If it sounds weird for you then just check internal loggers collection of logger factory to see that also other classes that need logger have their own instances. The code below shows how to get logger to controller through framework level dependency injection.

public class DummyController : Controller
{
    private ILogger _logger;
 
    public DummyController(ILoggerFactory loggerFactory)
    {
        _logger = loggerFactory.CreateLogger(typeof(DummyController));
    }
 
    // ...
}

Why we have to inject logger factory and not single instance of ILogger? Reason is simple – application may use multiple loggers like shown above. This is the fact we don’t want to know in parts of application where logging is done. It’s external detail that si not related to code that uses logging.

Logging

Logging is done using extension methods for ILogger interface. All classic methods one can expect are there:

  • LogDebug()
  • LogInformation()
  • LogWarning()
  • LogError()
  • LogCritical()

Now let’s write something to log.

public class DummyController : Controller
{
    private ILogger _logger;
 
    public DummyController(ILoggerFactory loggerFactory)
    {
        _logger = loggerFactory.CreateLogger(typeof(DummyController));
    }
 
    public void Index()
    {
        _logger.LogInformation("Hello from dummy controller!");
    }
}

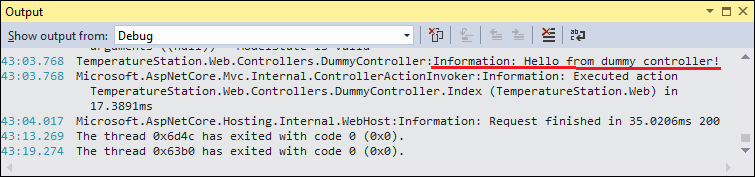
Making request to Dummy controller ends up with log message added to debug window and log file. The following image shows log message in output window.

And here is the same log message in log file.


About HostForLIFE.eu

HostForLIFE.eu is European Windows Hosting Provider which focuses on Windows Platform only. We deliver on-demand hosting solutions including Shared hosting, Reseller Hosting, Cloud Hosting, Dedicated Servers, and IT as a Service for companies of all sizes.

We have offered the latest Windows 2016 Hosting, ASP.NET Core 2.2.1 Hosting, ASP.NET MVC 6 Hosting and SQL 2017 Hosting.


Tag cloud

Sign in