Microsoft declared that they would no longer include the default Swagger gen UI with any.NET API project after the release of.NET 9. In the past, Microsoft incorporated the Swagger Swashbuckle package automatically when we established a.NET API project. This package had methods like apps.UseSwagger() and app.UseSwaggerUI(). Without the need for third-party apps like Postman, these techniques demonstrated API documentation with a preset user interface for testing straight in the browser. Nevertheless,.NET 9 web API projects no longer integrate Swagger. The package hasn't been properly maintained lately, and a lot of user-reported problems are still unfixed, hence this choice was made.

Microsoft.AspNetCore is a new package developed by the Microsoft team.Similar to Swagger, OpenApi offers integrated OpenAPI documentation production. Nevertheless, this just offers JSON documentation for all endpoints and schema definitions; the browser does not display any user interface. This change's primary objective is to enable customers to utilize any UI library they choose, be it Swagger or another option. You may still add Swagger to your project and carry out all of the same tasks as before, even though Microsoft removed the default package.
Although there are a lot of Swagger substitutes out there right now, we'll talk about and use Scalar in our API project in this post. Scalar has gained popularity among developers after Swagger.
Starting a New Project
You will be prompted to configure OpenAPI support when you create new projects with.NET 9. This checkbox will register the OpenAPI service in the program and add the Microsoft.AspNetCore.OpenApi package to your project.such a cs file.
var builder = WebApplication.CreateBuilder(args);
builder.Services.AddOpenApi();
var app = builder.Build();
if (app.Environment.IsDevelopment())
{
app.MapOpenApi();
}
Now, when you run your API and navigate to /OpenApi/v1.json, it will show the documentation generated by default, which contains information about your endpoints and all the schemas you have used, as shown in the image below.

Configure Scalar.NET
First, open your package manager and install Scalar.AspNetCore.

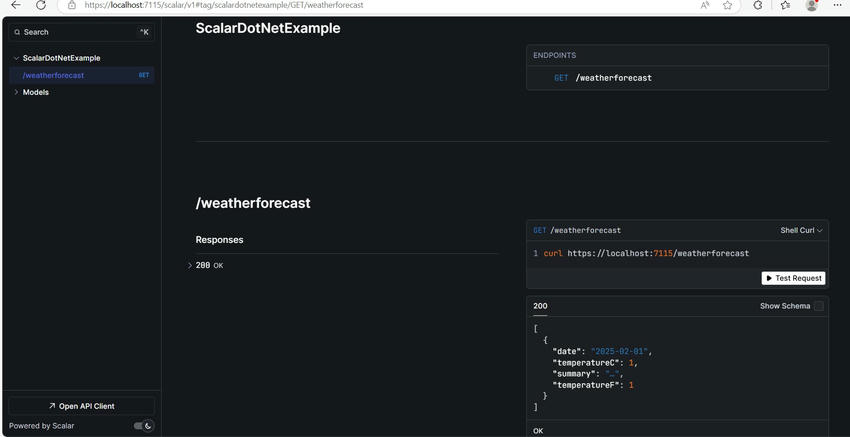
Then, just add the app.MapScalarApiReference(); in your program.cs file to map all the API references and routes of Scalar UI. Now, if you go to /Scalar/V1, you will see a beautiful UI for your endpoints. Here, I only have one endpoint, so it looks like this.
Configure Options of Scalar
You can configure multiple options and change the settings of your UI. Some configurations include.
- Title: Set the document title which shows on top of the browser tab
- DarkMode: true/false to enable and disable dark mode
- Favicon: Set the favicon of the document
- DefaultHttpClient: Show the default HTTP client when UI loads in the browser. It shows the code implementation for the respective programming language.
- HideModels: true/false to set whether to show model definitions
- Layout: Set the layout/theme of Scalar UI
- ShowSidebar: true/false to set whether to show sidebar. This only works when you have chosen the modern layout.
And many more.
Open Scalar UI by Default
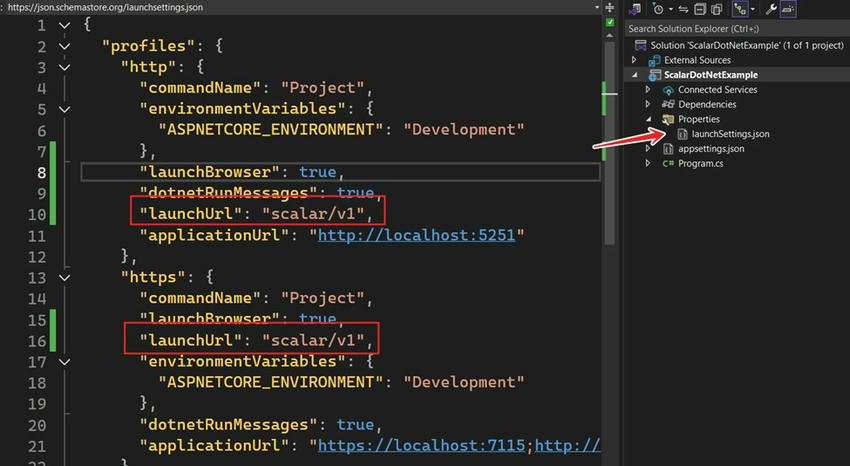
You might have noticed that we have to type scalar/v1 every time in the URL to see the Scalar UI. We can change the launch URL so we don't have to do this repeatedly. Open the launchsettings.json file and add the launch URL to your profile. I have added it for both HTTP and HTTPS. You can configure it as per your requirements.

Working with Authorization and JWT Token
In most APIs, we implement JWT tokens or other types of token authentication. So, I have added a few lines of code to implement authorization using the JWT token. I have also installed Microsoft.AspNetCore.Authentication.JwtBearer package for this.
builder.Services
.AddAuthorization()
.AddAuthentication(x =>
{
x.DefaultAuthenticateScheme = JwtBearerDefaults.AuthenticationScheme;
x.DefaultChallengeScheme = JwtBearerDefaults.AuthenticationScheme;
})
.AddJwtBearer(x =>
{
x.RequireHttpsMetadata = false;
x.SaveToken = true;
x.TokenValidationParameters = new TokenValidationParameters
{
ValidateIssuerSigningKey = false,
IssuerSigningKey = new SymmetricSecurityKey(Encoding.ASCII.GetBytes("your_jwt_key")),
ValidateIssuer = false,
ValidateAudience = false
};
});
app.UseAuthentication();
app.UseAuthorization();
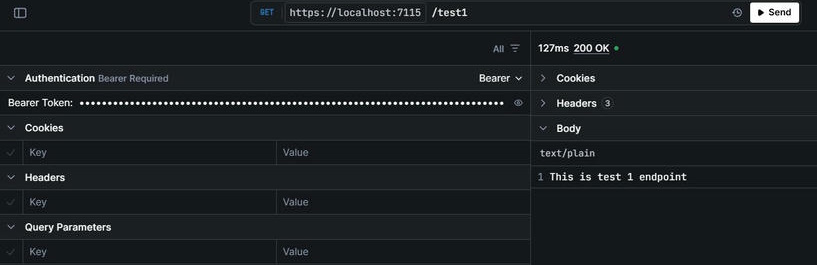
app.MapGet("/test1", () => "This is test 1 endpoint")
.WithName("Test1")
.RequireAuthorization();
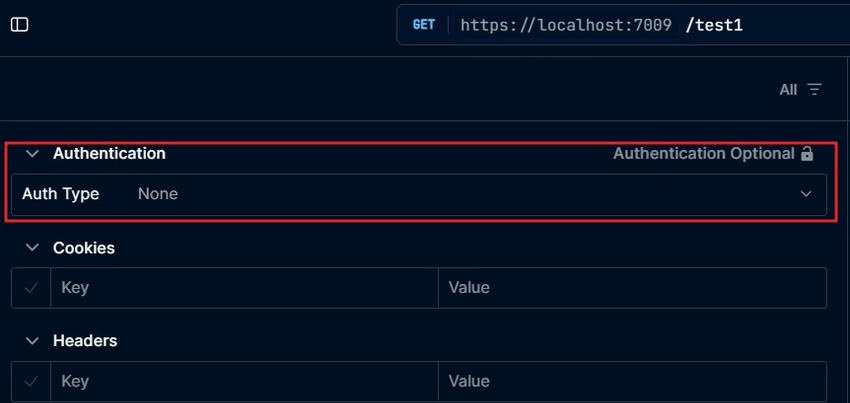
When I call this test1 endpoint, it gives me a 401 error (unauthorized). So, how can we resolve this? We can simply pass an auth token, but if you look at Scalar, there's no option to add an auth/bearer token on their UI. There's no option for Auth type even if I have added PreferredSecurityScheme as Bearer in MapScalarApiReference.
options.Authentication = new ScalarAuthenticationOptions
{
PreferredSecurityScheme = "Bearer"
};
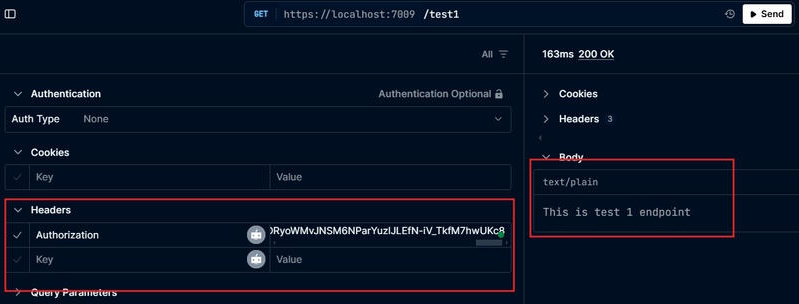
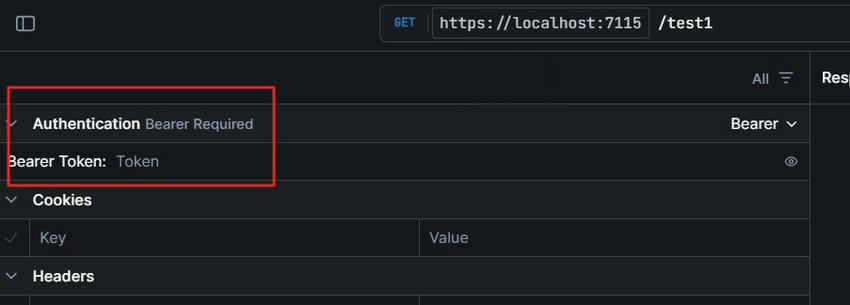
If you pass your auth token in headers with the Authorization key, it works, but that's not what we want, right? We want a similar interface to Swagger, which shows options to add tokens on the home page or in individual endpoints.
However, there is a way to achieve what we want and resolve this issue. We can use the functionality of document transformers in OpenAPI
Using this Transformer, we can inform Scalar that we want to show the Authentication option on our UI so that Scalar can add it on the home page and also in individual endpoints.
Here's the transformer class.
internal sealed class BearerSecuritySchemeTransformer : IOpenApiDocumentTransformer
{
private readonly IAuthenticationSchemeProvider _authenticationSchemeProvider;
public BearerSecuritySchemeTransformer(IAuthenticationSchemeProvider authenticationSchemeProvider)
{
_authenticationSchemeProvider = authenticationSchemeProvider;
}
public async Task TransformAsync(OpenApiDocument document, OpenApiDocumentTransformerContext context, CancellationToken cancellationToken)
{
var authenticationSchemes = await _authenticationSchemeProvider.GetAllSchemesAsync();
if (authenticationSchemes.Any(authScheme => authScheme.Name == "Bearer"))
{
var requirements = new Dictionary<string, OpenApiSecurityScheme>
{
["Bearer"] = new OpenApiSecurityScheme
{
Type = SecuritySchemeType.Http,
Scheme = "bearer",
In = ParameterLocation.Header,
BearerFormat = "JWT"
}
};
document.Components ??= new OpenApiComponents();
document.Components.SecuritySchemes = requirements;
foreach (var operation in document.Paths.Values.SelectMany(path => path.Operations))
{
operation.Value.Security.Add(new OpenApiSecurityRequirement
{
[new OpenApiSecurityScheme
{
Reference = new OpenApiReference
{
Id = "Bearer",
Type = ReferenceType.SecurityScheme
}
}] = Array.Empty<string>()
});
}
}
}
}
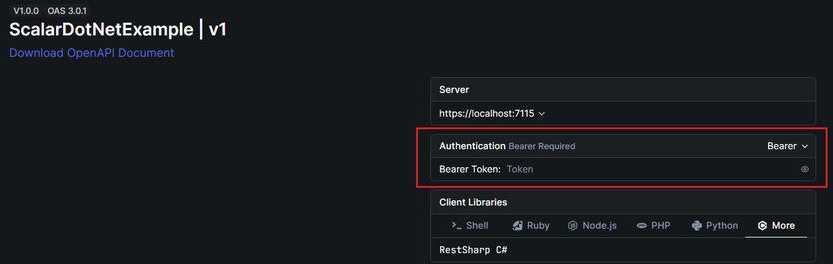
This code will add an Authentication option on the Home page and in all request endpoints where you can pass your token to send requests.
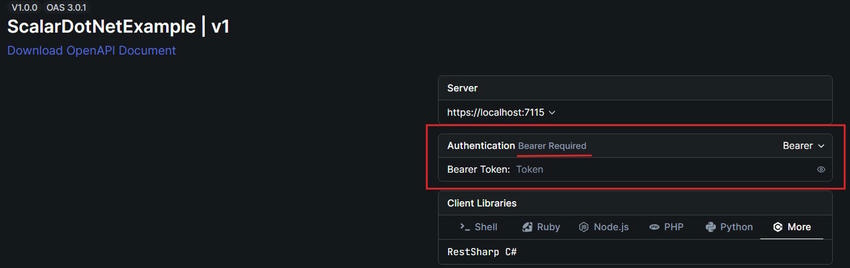
This code modifies OpenAPI/Scalar documentation to show that the API supports Bearer token authentication.
- It first checks if the API has "Bearer" authentication enabled
- If Bearer authentication exists, it adds a security scheme in OpenAPI/Scalar
- This security scheme tells OpenAPI/Scalar that requests should include a JWT (JSON Web Token) in the Authorization header
- By default, this only adds support for authentication but does not require it in OpenAPI/Scalar UI
- To make authentication look required in the UI, the code loops through all API endpoints and marks them as needing a Bearer token
The following loop does that,
foreach (var operation in document.Paths.Values.SelectMany(path => path.Operations))
{
operation.Value.Security.Add(new OpenApiSecurityRequirement
{
[new OpenApiSecurityScheme
{
Reference = new OpenApiReference
{
Id = "Bearer",
Type = ReferenceType.SecurityScheme
}
}] = Array.Empty<string>()
});
}
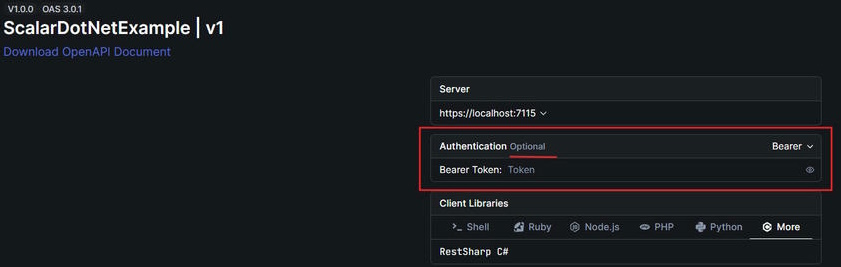
This only affects the OpenAPI/Scalar UI and does not actually enforce authentication in the API. Even if the UI shows authentication as required, the API will still accept requests without a token unless it has [Authorize] or RequireAuthorization().
To apply this transformation in OpenAPI/Scalar, use the following line.
builder.Services.AddOpenApi(options =>
{
options.AddDocumentTransformer<BearerSecuritySchemeTransformer>();
});
This ensures the security scheme and requirements are added whenever OpenAPI/Scalar documentation is generated. If you want to actually enforce authentication, you need to add [Authorize] to controllers or RequireAuthorization() in Minimal API. Now you can pass your token in this input, and it will be passed to the server without any issue, and you won't get a 401 error anymore.
I hope you like this article. If you have any questions, you can ask them in the comments, and don't forget to like and follow.